Tuesday 26 February 2019

Soft kitty!...

Hello everyone!

I have another card to show you with the absolutely gorgeous 
To make this card I first created a background by blending 
onto a piece of card and splattering it with water and Perfect Pearls (In Pearl and Blue Patina).  I die cut the background with the largest 

I created a frame with the largest die from the 
embossed it with a paw prints embossing folder and fixed the frame to the background.

I had a spare piece of card from a recent make which had been blended with some distress inks in shades of blue so I used this to die cut the 
which I fixed to the top right hand side of the card design as shown. 

I stamped the Kitties from the 
stamp set in black ink and fussy cut the kitty on the right hand side.  This kitty was coloured in Copics - W4, W3, W2, W0, R02.

Finally I die cut a white tag and stamped the sentiment onto it, securing it to the right hand side of the frame with some twine.

I used foam to fix the kitty to the left hand side of the tag as shown.

I have so loved making cards with the gorgeous Adopt Don't Shop Cat and Dog sets!
and remember for every stamp set purchased Whimsy Stamps is making a $1 donation to the Gulf Coast Humane Society!
Be sure to pop to 
to see the gorgeous DT creations there and then to 
to engage in some essential retail therapy!


love from Sue...xxx


Edna blows a kiss...

Hello everyone

I hope it's a happy Tuesday for you!

I have been having such great time crafting lately!

I am so enjoying creating backgrounds and colouring up gorgeous images!

I don't know about you but it takes me more time to decide what to colour than it does to actually make a card!

Today I have a spring inspired design to show you with gorgeous
To make the background I stamped and heat embossed the 
in white and then blended Scattered Straw and Shaded Lilac Distress Oxide over it.  (The white embossed background resists the Distress Oxide)!  I die cut the background in a circle.

Then I flicked water and Perfect Pearls over the background and let it dry.

I stamped Edna in MFT - Hybrid Ink Pad in Extreme Black and coloured her with Copics
Skin E93, E21, E00, E51
Hair E99 YR24, YR23
Frock BV08, V17, V15
Wings Y11, Y13, V000, V01.

I fussy cut her and added some sparkle - Rangers Diamond Stickles - to her wings.

I created a rectangular card blank and added some MFT Tiny Hearts 6 x 6 Paper.

What I love about Edna is that she makes me do things I would n't usually do - like add ribbon!!! (:

Finally I added a Stamping Bella Butterfly Sentiment and fixed Edna to the background and the background to the card!
I really enjoyed creating this card - I adore Edna everything about her is just so rosy!

Be sure to have a look around our 
to see the gorgeous DT creations there and pop to then to 
to engage in some essential retail therapy!

Thank you for popping by,
Happy creating! 

love from

Sue...xxx


Sunday 17 February 2019

Adopt Don't Shop - Cats!...

Happy Sunday Friends!

Hope you are having a good day!

Today is the last day of our fabulous
at wonderful

In the interests of equality, having already made a few doggie cards,  I have made a card with the beautiful 
I stamped the cute cats in black ink and cut the image out with the 
I coloured the background and the kitties with Polychromos Pencils and added some Stickles Glitter Glue in Star Dust

I mounted the image on a piece of design paper, also die cut with the 

I stamped one of the fab sentiments from the stamp set on to white card and die cut it with the 

Finally I embossed a strip of vellum with a paw print embossing folder and added that and the sentiment underneath the design with a paperclip!
This was such fun to make - I adore this beautiful stamp set!
Pleeeease come and join the party and join in the fun whilst at the same time raising funds for such a good cause! 

Whimsy Stamps and the team are all animal lovers and we’re excited for you to be part of our efforts to help pets in need of adoption. For every Whimsy Stamps Adopt Don’t Shop Cat and/or Dog clear stamp that is sold Whimsy Stamps will donate $1 USD to the *Gulf Coast Humane Society. And by you simply purchasing a fun stamp set or two, you are automatically donating to this worthy cause. While there is no single solution for this complicated issue, if we all do even one small thing it can really add up to make a big difference. Thank you so much for your support!

Thank you for popping by!
Happy Crafting!
love from Sue...xxx


Thursday 14 February 2019

Adopt Don't Shop - Paaaaartaaaay!...

Happy Thursday friends and Happy Valentines/GALentines Day!
We are having some fun today with 
wonderful 

Whimsy Stamps and the team are all animal lovers and we’re excited for you to be part of our efforts to help pets in need of adoption. For every Whimsy Stamps Adopt Don’t Shop Cat and/or Dog clear stamp that is sold Whimsy Stamps will donate $1 USD to the *Gulf Coast Humane Society. And by you simply purchasing a fun stamp set or two, you are automatically donating to this worthy cause. While there is no single solution for this complicated issue, if we all do even one small thing it can really add up to make a big difference. Thank you so much for your support!
To help this fabulous FUNdraiser you can join our Adopt Don't Shop Party on Facebook by following the link - HERE
This is a subject so close to my heart, especially this week as on Sunday we adopted our  new four legged family member Neo, to join our other adopted fur babies Ruby Roo and Phoebe Mouse! 
The joy they bring us is indescribable and as rescue dogs, all they want is to give and receive love!
 Ruby and Neo
Phoebe and Ruby

I have a bit of 'work in progress' to show you that I am making with the gorgeous 
I stamped the super cute doggie image and coloured it with Copic Markers, adding a Copic drawn background.  I used the Card Builder Windows Die Set to cut the image out.   I have also stamped a few of the fabulous sentiments to add to my card when I assemble it!
Pleeeease come and join the party and join in the fun whilst at the same time raising funds for such a good cause! 
Thank you for popping by!
Happy crafting! - love from Sue...xxx

Saturday 9 February 2019

Fur - I love you!...

Hello everyone,

I really love colouring fur so I thought I would do a tutorial for you!
I am using a stamp by 
Whimsy Stamps 
My Significant Otter Rubber Stamp by Crissy Armstrong 
and Copic Markers
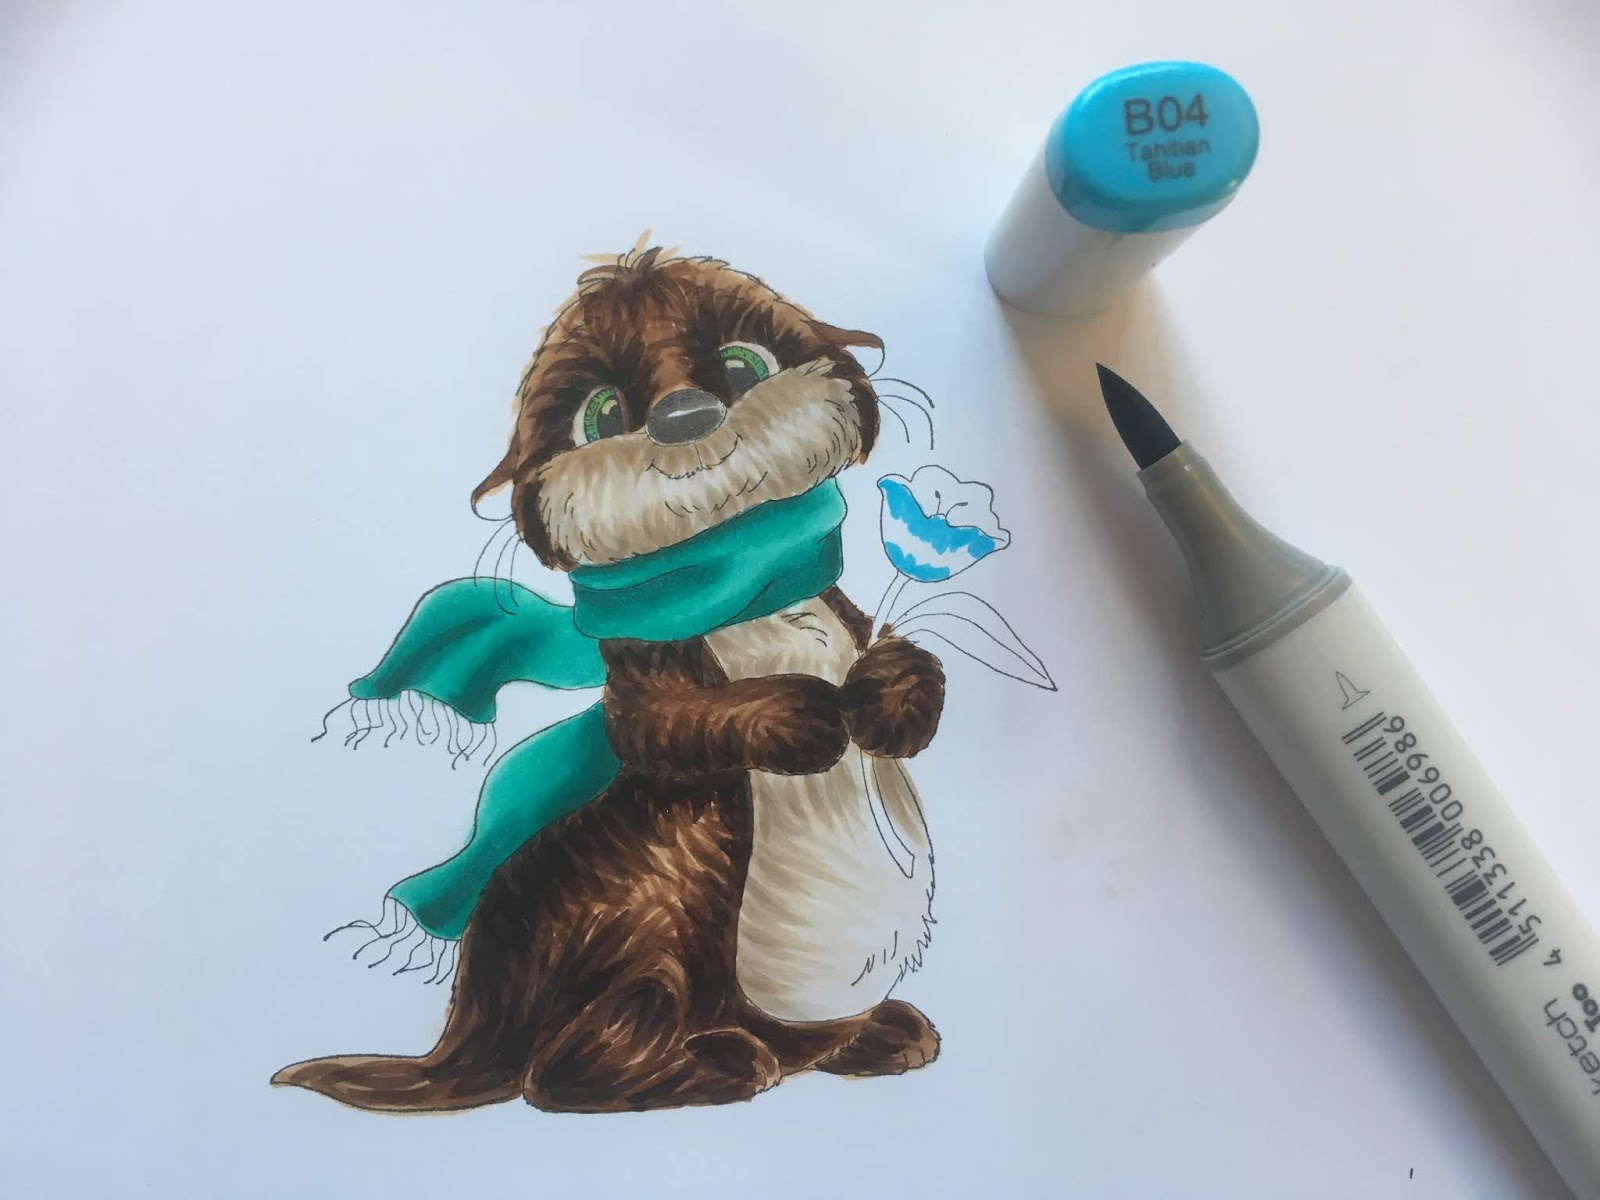
E40, E41, E42, E43, E44, E51, E53, E55, E57, E59

The technique I have used is very similar to one you would use for colouring hair!  Here are a few top tips for you!

It's good to use a flicking motion to apply the ink, this helps add texture.
Always make a flick in one smooth movement.
Always flick in the direction the fur grows. 
Let each layer of ink dry before adding the next so the colours don't blend together

I always practise my flicks on a piece of scrap card before I start colouring my image, this gets my hand used to the flicking action - it might sound silly but trust me - it works!

There are a lot of photo's for this tutorial so please be patient!
To begin, I lightly coloured the otter's tummy with E40.  This does nt need to be too neat or perfectly blended, it is simply a base layer for the fur to sit on.
Then, I started to add flicks in E42, in the darker parts of the tummy area, some of these need to be quite long and go across the tummy to add texture.
Then add more flicks with E43.
 Next I coloured the mask, again with a light layer of E40.
Then, exactly like the tummy, I started adding flicks in E42...
 E43
 and W3, which adds some depth.
 I then moved on to the paw, lightly colouring all of it with E55.
 followed by flicks in E57
 and E59.
I did exactly the same with the other paw, a light layer of E55
 Followed by flicks in E57
 and E59.
 The same technique is then used for the feet (paws)!  E55 coloured all over and followed by flicks in E57
 and E59.
 Then I moved onto the otter's body.  It is a good idea to take this really slowly - do not rush!  You can still break the body down into smaller parts, the tail, the foot and the area under the am and tummy.  I used exactly the same technique as before, colouring the whole body with E55 and then starting to add colour and texture by flicking with E57
 and E59.
 To enhance the shaded parts of the body, where I wanted it to look darker, I added a few flicks of E49.  If you choose to do this you only need a few - do not add too much of this darker colour!
 Next, I moved on to the face and head, colouring the whole area lightly with E55.
 Then I added flicks of E57 around the eyes, down the sides of the muzzle and on the top of the head,
 Followed by Flicks of E59...
 ...and W6
 You might want to go for a break and a cup of tea here, before you start the colouring the last parts of the image! (:
 I coloured the darkest, shaded areas of the scarf in BG32 to map out where my darkest colour would go.  It's a good idea to do this first, in a light colour because if you get it slightly wrong at this stage, you can cover it up later, you have n't ruined your colouring by going straight in with your darkest shade!
 I then went back and coloured these parts with BG49
 and then started blending the colours out to the lightest area with BG13.
 I repeated this, colouring the same darkest part again with BG49, 
then blending BG49 out with BG13
 followed by BG11.

I used exactly the same technique to colour the rest of the scarf.
 I coloured the flower next in BG04
 followed by BG37,
 BG06...
 ...and BG04.
 For the leaves and stalk I used G43, 
 followed by G46...
 G43...
...and finally YG03

I hope you have found this tutorial useful!

It would be great if you could try this technique and share with us on Facebook at 
It's our 30th Wedding Anniversary this weekend and this card is for my lovely husband!

Thank you for popping by
Sue...xxx