Thursday 29 November 2018

Oh Holy Night...

Hello everyone!, Hope it's a happy Thursday!

Today I have been playing with inky backgrounds again and trying to make a ray of light!

This beautiful stamp set 
from 
is just perfect to try this background out!

Ingredients from
(UK friends, you can buy these from Dies To Die For)
Other Ingredients
Copic Markers
Background B39, B37, B34, Colourless Blender Pen, 
Skin V12, E00, E000
Swaddling, E40, E41, E43
Manger YR27, YR24, YR23, E23, E25, E27
Silver Gel Roll Pen
White Polychromos Pencil
Silver Glitter Card


Be sure to pop to 
to see the gorgeous DT creations there and then to 
to engage in some essential retail therapy!


Thank you for popping by,
love from Sue...xxx


Sunday 25 November 2018

Be your own kind of beautiful...

Happy Sunday friends...

Today I have a no lines image to show you!

I love Stamping Bella and I have used Copics to colour the gorgeous image
I used Tumbled Glass Distress Oxide and Perfect Pearls to create the background on Strathmore Vellum Bristol Paper.
I die cut Layla with her matching die, fixed her to the background and added some 
The design is mounted on blue mirror card.
Copic Markers
Skin - V12, B93, E00
Hair - E23, E25, E27
Frock - R37, R35, R32
Jacket - B29, B25, B23


Thank you for popping by today!
Happy Crafting!
love from
Sue...xxx

Thursday 22 November 2018

Cool Christmas...

Hello Friends!

Well, I don't now about you but I have given up pretending that I'm not fussed with Christmas because truth is I am having such a lovely time making Christmas cards! /-:

In fact I'm having such a fab time that today I have made two!
Ingredients from Dies To Die For
*(Currently out of stock but there are lots of other gorgeous Christmas papers you could use)
To make this card I stamped and masked the image and first created the background with Distress Oxides
Chipped Sapphire, Peacock Feathers, Cracked Pistachio 
The image is coloured with Copics and Polychromos
Car - BV23, BV20, Dark Indigo and Black
Snowmen - Cold Grey iv
Hats and scarves are a selection of reds, greens, purples
The snow is a white Signo Uniball Gel Pen
This tag/card is coloured with Polychromos - I didn't note the colours but it is a simple selection of reds, greens, purples
The snow is a  white Signo Uniball Gel Pen
Finally I added a red velvet bow with silver bells - pure Christmas indulgence! (:


Be sure to have a look around our 
to see the gorgeous DT creations there and pop to then to 
to engage in some essential retail therapy!

Thank you for popping by,
Happy creating! 

love from
Sue...xxx


Tuesday 20 November 2018

Penguin and Reindeer Crush...

Hello everyone!

I'm flying by today with the sweetest card!

It has several of my favourite features...
Reindeer, penguins, and a Copic coloured background!

Plus, it is made with stamps by Crissy Armstrong and Deb Davis 
for wonderful
Whimsy Stamps
Ingredients from Whimsy Stamps 
Penguin and Reindeer Friend Rubber Cling Stamp by Crissy Armstrong
Dash Away Clear Stamp Set by Deb Davis
Other Ingredients
Grey Ink Pad
Archival Ink Pad
Stix2 Masking Sheet
Embossing Pad and Silver Embossing Powder
Black Glitter Card
Copic Markers
Background - B99, B97, B93, B91, Colourless Blender Pen, Silver Pen
Moon - C00, B60, BG000
Penguin - BV29, BV25, BV23, C00, C2 and Colourless Blender, YR27, YR24, YR23, 
Reindeer - E40, E41, E43, E44, W7, W5, W3, E40, W00, W2
Reds - R59, R29, R27, R24, R14
Greens - G28, G24, G21
Yellows - Y19, Y15, Y11
Grey and Brown Polychromos for eye detail
I absolutely loved colouring this!

Be sure to pop to 
to see the gorgeous DT creations there and then to 
to engage in some essential retail therapy!

Thank you for popping by,
love from Sue...xxx


Saturday 17 November 2018

all I want for Christmas is you...

Hello friends,
sending you all Saturday best wishes!

Today I am here to show you one of my favourite stamps...
...gorgeous!...
Ingredients from Whimsy Stamps 
(UK Peeps you can buy from Dies To Die For)
Other Ingredients
Background - Distress Oxides in Broken China, Faded Jeans, Chipped Sapphire, White Gel Pen
Black Ink Pad
Copics and Polychromos 
Circular Dies
Grey Ink Pad (sentiment)
Purple Pearlescent Card

Be sure to pop to 
to see the gorgeous DT creations there and then to 
to engage in some essential retail therapy!

Thank you for popping by,
love from Sue...xxx


Friday 16 November 2018

Gleeful Santa Kinetic Dies Tutorial...

Hello everyone

Happy Fri-Yay!

Today I have a tutorial to show you how to use the fantastic new kinetic dies by 
Jennifer Dove from
Santa just looks amazing jumping across the room and the magic is that you can't see any of the kinetic mechanism!
My card features the fabulous digi stamp 
The bedroom background digi from 
and paper from
plus the wonderful new 
and
I used PowerPoint to assemble the digi elements, printed them and coloured Santa as above.
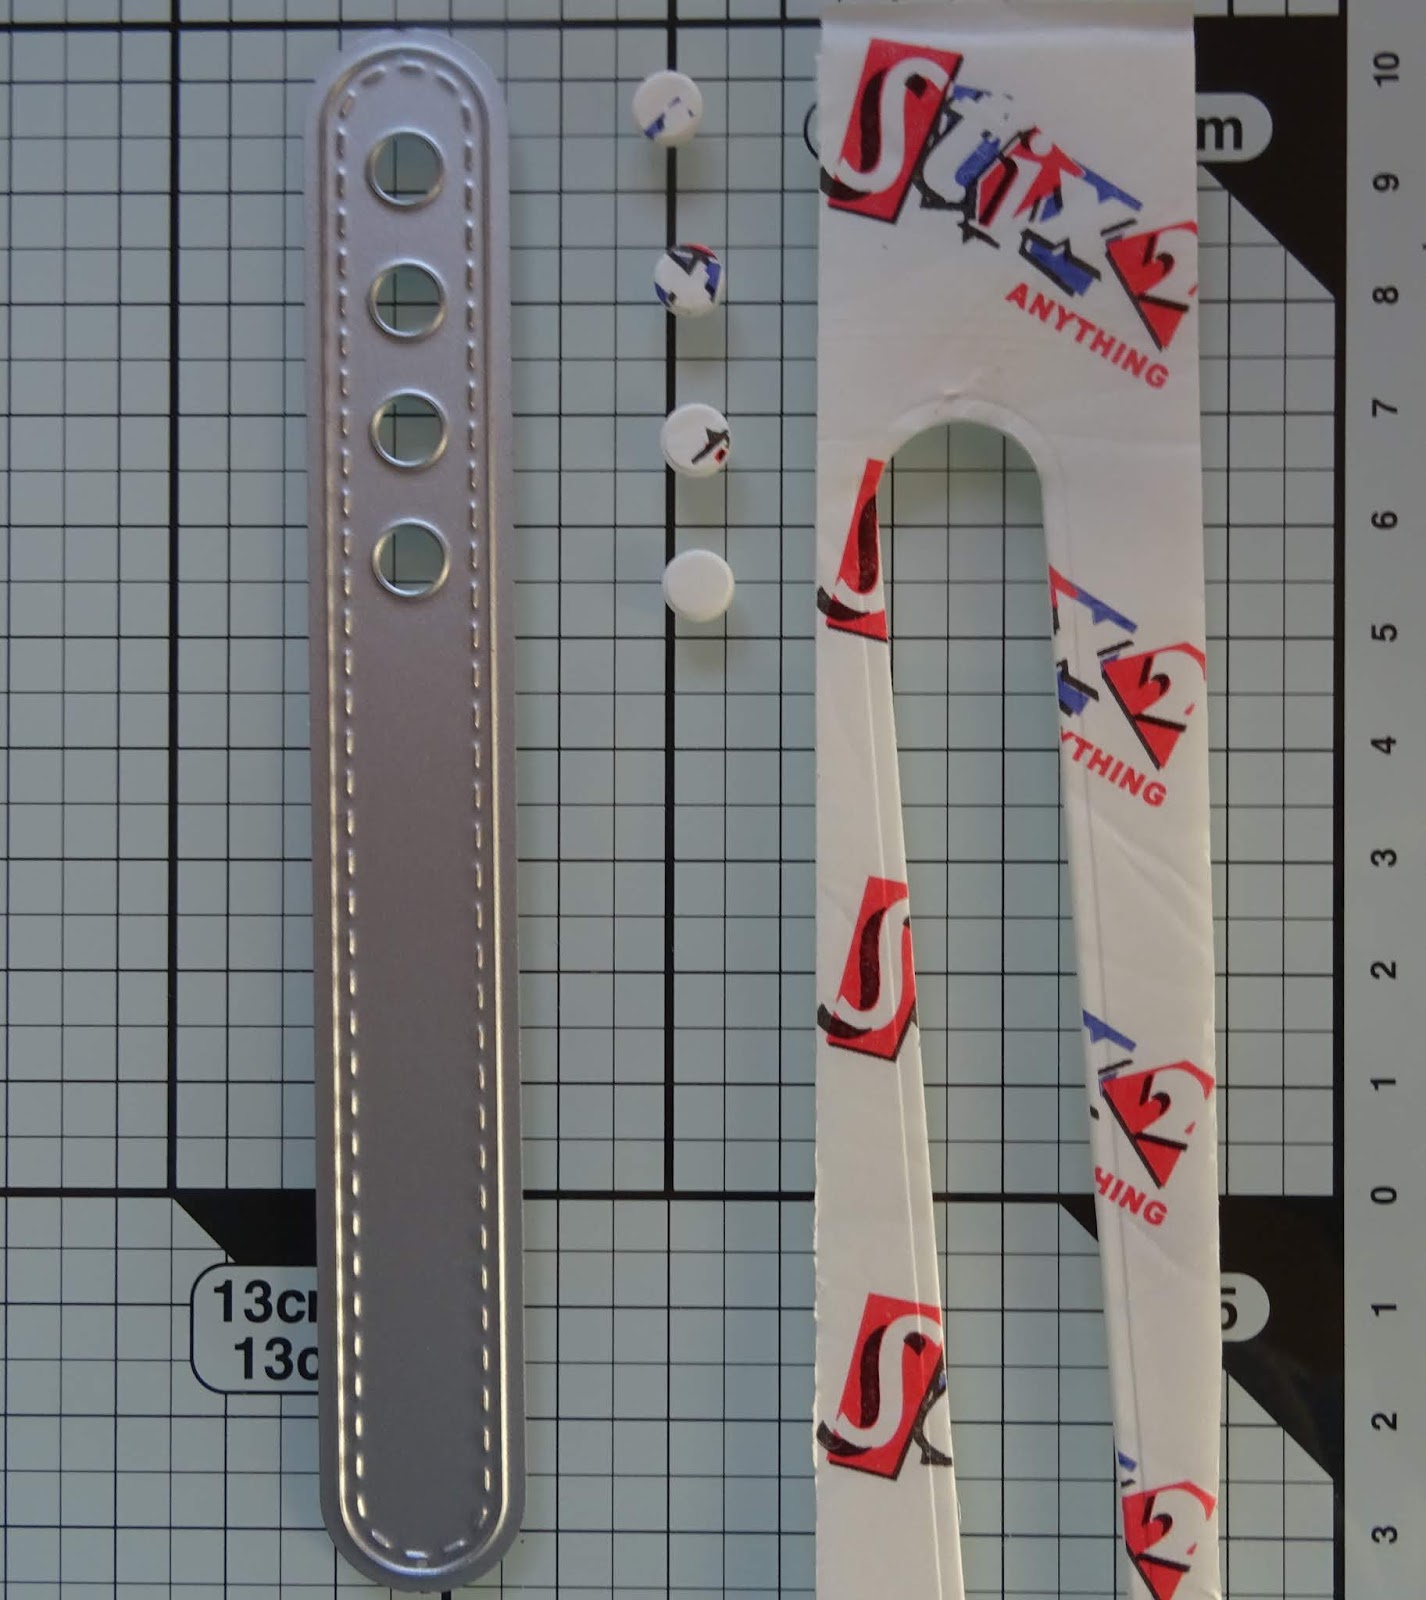
...then I die cut 300gsm black card with the basics set...
...and die cut some 2mm foam with this piece to use the little circles as spacers.  (If you don't have foam you can stick the 4 die cut card circles together but I used foam because I'm lazy!
...then I die cut the plain floorboard piece with the smallest curved die.  To assemble the kinetic mechanism you will need the black card elements above, the foam dot and some glue dots...oh and of course...Santa!...
...now, this is the important part - concentration (and chocolate)! required! (;
working from the back, I stuck together a black disc and the foam dot.  Putting the dot through the hole on the slider element (which hole depends on the size of the project).  
...then I placed the curved cut floorboard section over the foam dot...
...and fixed the second black disc to the foam dot with a glue dot.
I creased the vertical slider element at the point which matched Santa's size,
...and fixed santa to it so that his feet hung over the skirting board.
 
I added 2mm foam to the back of this piece - adding a strip underneath the black slider keeps it level when you slide it.
Then I fixed the kinetic element I had just assembled to the card background...
Then I took the floorboard section I had coloured in...
...and again using 2mm foam, fixed this piece over the corresponding part of my design.
...and here it is, my finished card!  great fun to make and you can't help but smile when you push and pull the slider element and Santa jumps backward and forward across the room!
isn't it wonderful, and just so magical to not actually see any of the mechanism?

my lovely DT Teamies have been working so hard to make some gorgeous kinetic cards for you, with videos and tutorials so it is definitely worth popping to the 
Whimsy Inspirations Blog and then to their personal blogs to take a look!

Followed of course by some essential retail therapy at 
wonderful

Thank you for popping by,
Happy Creating 
love from
Sue...xxx


Thursday 15 November 2018

A little bit of magic ...

Hello everyone!

I hope this week is being kind to you.

Today is really exciting and at wonderful
we have been looking forward to it for aaaaageees!

Today sees the launch of a brilliant and clever set of new dies to make interactive kinetic cards!

I made two Christmas cards and let me tell you the possibilities with these fabulous dies are endless!
We have had such fun with these!
It is great fun to pull the tab and see the image move without seeing any of the mechanism!
Ingredients from Whimsy Stamps
                  
Other Ingredients
MFT Ink Pad in Cement Gray
Copic Markers
Reindeer E37, E35, E33, E31, Hooves W5, W3, W1, Antlers E40, W3, W1
Nose R59, R29, R17, R05
Bells Y19, Y15, Y11
Burnt Sienna Pencil
Moon C00, B60, BG000, BG10
Background B000, B00, B21, B24, B26, 0 Colourless Blender
Silver Gel Pen
Vellum
Black Staz-on Ink Pad
Wow Slow Drying Embossing pad
Wow Mercury Embossing Powder
Sequins
300gsm card for Kinetic elements
Stix2 Foam
Glue Dots

Be sure to pop to 
to see the gorgeous DT Kinetic creations there and then to 
to engage in some essential retail therapy!

Thank you for popping by,
Happy Creating love from
Sue...xxx
Call back later and I'll have a little tutorial to show you how these ingenious dies work!


Friday 9 November 2018

Believe...

Hello everyone!

I'm here today with a short tutorial to show you how you can achieve a Copic Airbrushed look for your cards even if you don't own a Copic Air system!

Oh my word, this was fun!  I practiced for a while with different colours and 'mixes' until I found one I was happy with - and this all seemed to work fine!
Here are the things I used for this technique
Make it Colour Blending Card by Elaine Hughes (Marker Geek)
Masking Sheet (I use Stix2)
Whimsy Stamps - Snowy Trees by Chrissy Armstrong
and Whimsy Stamps - Dash Away Clear Stamps by Deb Davis
Copic Refill B39, Copic Colourless Blender Refill
Mini Mister, Mist-It! or similar small spray bottle
Archival Ink Pad in Black 
(Archival ink is very good for stamping over the top of alcohol markers)!
Small hole punch (Approx 1cm)
First I created a mask by using the largest Snowy Tree die and a small hole punched circle.
The part of the page I want to make is the are around the tree, I want the tree to be inky!
...then I poured about half and half Colourless Blender and B39 Copic refill into a small spray bottle and gave it a shake.
I sprayed the card, holding the spray bottle well over 25cm's away from it.  (It's a good idea to have a few practice spays on some spare paper first so you can get used to how the ink comes out.  The faster and finer the spray the better the finished image will look).
I sprayed the card a few times until I was happy with how the ink had covered the card and how smooth it looked.
...and here is the fun part!  I hope I'm not the only one who finds this bit exciting!
I slowly peeled the mask away to reveal the tree image!
I have to say, I was fairly happy with the result!  The ink ran little under the mask but I simply pushed the ink back with Copic colourless blender.
...I coloured the little moon with Copic Sketch YR82, YR30, W0
 ...then I trimmed down the image and stamped my Christmas Design!
...and...the spray bottle of Copic B39 will keep if the lid is firmly closed so you can use it again, and again....and again!
Ingredients from Whimsy Stamps
Snowy Trees Die Set by Chrissy Armstrong
Dash Away Clear Stamps by Deb Davis
Hand Stitched Nested Rectangle Dies
Archival Ink Pad in Black 

Other Ingredients
Quickie Glue Pen
Gold Glamour Dust
Back Glitter Card 

Be sure to pop to 
to see the gorgeous DT creations there and then to 
to engage in some essential retail therapy!

Thank you for popping by,


Happy creating!