Sunday 30 April 2017

Happy Thoughts...

Happy Sunday everyone!

I am here today with a real sweetie!  In fact she's a real 
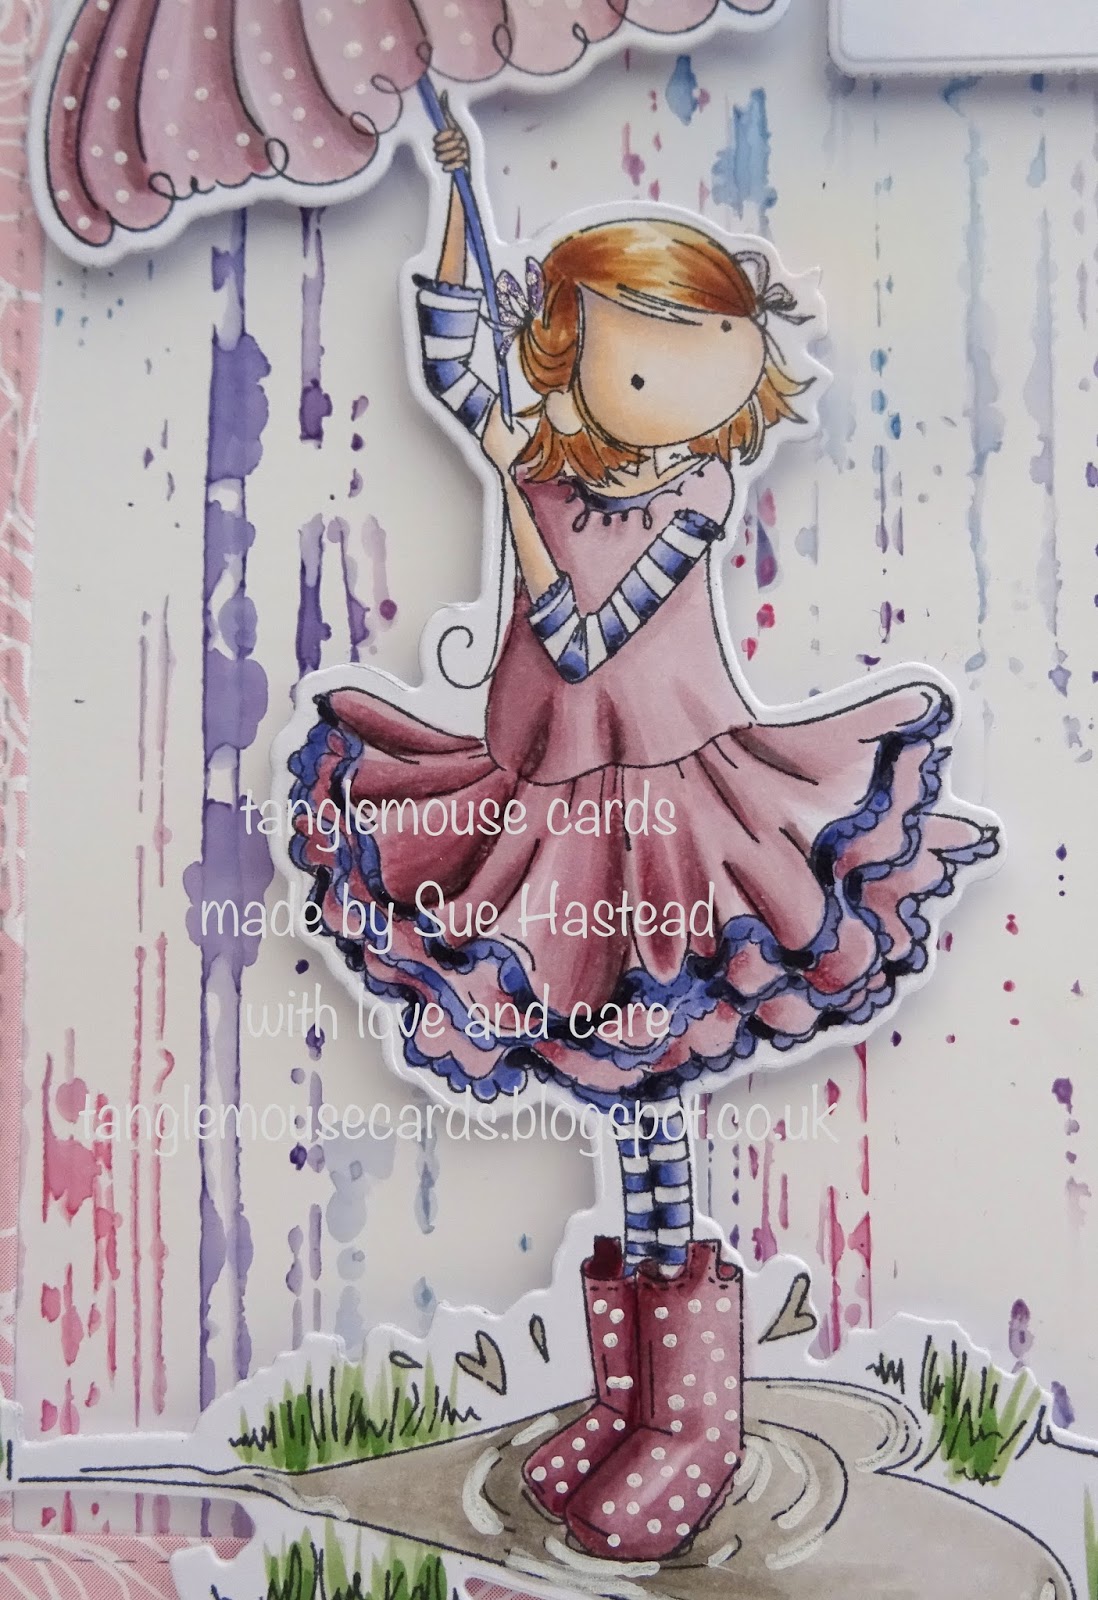
Braided Sweetie

...and I want to say a big thank you to my lovely DTDF DT teamie Elaine (Marker Geek) for the inspiration - I love how Elaine cuts out the individual words for the sentiments on some of her cards and could nt wait to try that myself!

I coloured this sweetie with Copics and kept the card design fairly simple, borrowing Elaine's sentiment idea.
Ingredients from Dies To Die For

Other Ingredients
Make It Colour Blending Card by Elaine Hughes (Marker Geek)
Memento Ink Pad in Tuxedo Black
Copic Markers
Collall All Purpose Glue
Inks Used
Copic Markers -
Skin, BV20, E21, E00, E50
Eyes, W9, BG09, B02, BG10, W0
Hair, E41, E43, E47, E49
Frock BG09, BG49, BG45, B39, B37, B34, B32
Flowers, B39, BG09, BG49, BG45
Thank you for popping by.
Happy Crafting

love from Sue...xxx

Don't forget to pop straight to the Dies To Die For inspiration blog to look at the lovely DT creations there, and then straight to Dies To Die For for some essential retail therapy!


Sunday 16 April 2017

You are my sunshine...

Good Morning everyone,

I hope you are enjoying the Easter break, 
I am here today sharing a rainy day card with a great Copic technique.
I thought I would try a technique with Copic refills and stencils that I have used previously with Distress Ink pads and stencils!  I am really pleased to say that the technique works really well with Copics!

I have put together a tutorial to hopefully show you how you can also achieve such a fun background.
Here are the goodies you need.  You can see that the first thing I did was to colour and cut out the beautiful Stamping Bella Tiny Townie - Rachel loves the Rain.  Make sure you put her somewhere safe while you get inky with your background!
It is important to work swiftly with this technique because the ink dries quite quickly so open all of your refills before you start and tip some colourless blender into your spritzer bottle.
Randomly dab some rows of tiny dots of ink from the Copic refills onto your mat so that you have covered an area roughly the same size as your stencil.
Working quickly, give the ink one fine spray of colourless blender.
Place the stencil 'ink side down' onto your piece of card
and gently tap the stencil all over with a piece of tissue paper.
Carefully lift the stencil away from the card, this is the effect you will see - isn't it pretty!
Finally, clean your work surface and stencil with some Copic Cleaner.

Here is my finished card.
I hope you have enjoyed my tutorial.  It would be great if you could try this technique and show your cards to us at Copic Marker Europe on Facebook.
To find us just follow the link

Copic Marker Colour Combinations
Skin V20, E00, E000, E0000
Hair E50, E31, E33, E25
Clothes RV95, RV93, RV91, BV29, BV13, BV02, BV31
Puddle W5, W3, W1
Grass YG67, YG63, G21

Copic Marker Refills for Background
B91, BV11, R81, 0 Colourless Blender

Other Ingredients
Make It Colour Blending Card by Elaine Hughes (Marker Geek)
 Memento Ink pad in Black
White Posca 1mm Pen
Stix 2 Foam Pads
Thank you for popping by.
Happy Copic colouring!
love from
Sue...xxx


Sunday 9 April 2017

Love always...

Happy Sunday everyone!

I'm here today on this special 10th Birthday weekend for our lovely Tracy's

There are some wonderful birthday surprises happening all weekend so keep your peepers on the Dies To Die For Facebook Page 
and check your Dies To Die For newsletters.

Today's card is one I have wanted to make for ages!  I have really been wanting to have a go at slider cards, and here we are!

I promise you they are really straightforward to make and such fun!
...bunnies in love!  You have permission to say aaaaahhhhhh <3
Stamps - Kraftin' Kimmie - Hello Spring (bunnies)
Inks Used
Memento Ink Pad in Tuxedo Black 
Copic Markers - 
bunnies, W0, W1, W3, W5 and colourless blender pen, tails - N0, N1, N3
heart, R46, R24, R14
Sky, B02, B00, BG000, BG0000
Grass, YG67, YG17, YG25

Thank you for popping by.
Happy Crafting

love from Sue...xxx

Don't forget to pop straight to the Dies To Die For inspiration blog to look at the lovely DT creations there, and then straight to Dies To Die For for some essential retail therapy!

Remember - keep 'em peeled today for some Dies To Die For 10th Birthday fun, offers and perhaps, who knows, a freebie!
Thank you for popping by.
Happy Crafting

love from Sue...xxx

Don't forget to pop straight to the Dies To Die For inspiration blog to look at the lovely DT creations there, and then straight to Dies To Die For for some essential retail therapy!

Remember - keep 'em peeled today for 10th Birthday fun, offers and perhaps, who knows, a freebie!


Sunday 2 April 2017

Bottoms up!

Hello everyone,

Oh my!  The days and months are already whooshing by too quickly this year!  
April already!  

I'm here to day with a spring treat for the Use Any Image Challenge at
Our new use any image challenge starts to day with some fabulous prizes for three lucky winners!  All the details can be found

I decided to encourage spring on its way with this gorgeous Stamping Bella stamp
Row of Bunny Wobbles.

I coloured these cuties with Copics and created a card design with stitched dies.

Finally I used some gorgeous embellishments from
(these are all listed further down in this post)

..and here we are Bunny Wobbles with bottoms up!...
Ingredients from The Ribbon Girl Online Store

Other Ingredients 
Row Of Bunny Wobbles Stamp by Stamping Bella
Memento Ink Pad in Tuxedo Black
Make it Colour Blending Card by Elaine Hughes (Marker Geek)
Lawn Fawn Stitched Oval and Stitched Rectangle Dies (Dies To Die For)
Your Next Stamp Stitched Fishtail Banners (Dies To Die For)
Mama Elephant Mini Messages and Mini Tags (From Dies To Die For)
Desert Storm Kraft Card by Crafter's Companion
Xcut Small Butterfly Punch
Woodward Small Leaf Punch
Liquid Pearls in Petal Pink
Collall All Purpose Glue
Inks Used
Copic Markers -
Bunnies, W5, W3, W1, W0, C3, C1, C0, R04, R11, R000
Grass YG63, YG61, G21
Thank you for visiting,
happy crafting!
from Sue...xxx

...and remember to pop straight to
The Ribbon Girl
to look at the wonderful DT inspiration and join in the fun
and then straight to 
The Ribbon Girl Store
for some essential retail therapy!

...and finally, I woke up to a lovely treat today and a real honour!
follow the link
if you're intrigued to see a fabulous new feature at