Showing posts with label Sparkle Pens. Show all posts

Sunday, 19 July 2026

Stamping Bella - Littles Sandcastle Digital Stamp Set

Hello friends!  
I hope you are enjoying a super Sunday!
 
I'm back again to show you another super digital stamp set from fabulous Stamping Bella!


This set is just great!  It has so many stamps - and all so cute!  
I just love that itty bitty seagull! 

Ingredients from Stamping Bella

Other Ingredients
Bockingford Hot Press Water Colour Card
Zest It Blending Fluid 
Hobbycraft Multi Media Card (I like this one - it is really white with no grain)
Crafter's Companion Sparkle Pens (Background)
Kraft Card
Gold Glitter Card
Vellum
Spellbinders Clouds Die Set
Sun Die - ancient from MFT Think?
Stripey Design Paper - also ancient - My Mind's Eye
Wink Of Stella Clear Pen

Faber-Castell Polychromos Pencils


...just incase this is useful...
I use PowerPoint to create my digital card designs,
I have a fairly basic HP printer and I set my ink settings on draft to print, the image comes out beautifully and there isn't so much ink that it smudges or is affected by pencils/alcohol markers.

Thank you for popping along today,
Happy crafting
love from
Sue...xxx


and...look at this wonderful offer from our lovely Stamping Bella - digital stamps (apart from the latest release) are 20% off until Midnight EDT 19/07 and 5am BST 20/07


Thursday, 11 June 2026

Stamping Bella - Rosie and Bernie Under The Sea Digital Stamp Set (again)! ...

 Happy Thursday friends!

I hope you are all well!

I am back today with another card made with a gorgeous digital stamp set from wonderful
Stamping Bella - I did say Bernie would feature soon! (:


Copic Markers
Crown - BG57, BG34, BG32, BG11
Bernie - W5, W3, W2, W00, R00, R000
Mane - R56, R85, R83, R81
Chest/Treasure - E44, E43, E41, W5, W2, Y26

Other Ingredients 
Crafter's Companion Sparkle Pens (Background)
Wink Of Stella Clear Pen


...just incase this is useful...
I use PowerPoint to create my digital card designs,
I have a fairly basic HP printer and I set my ink settings on draft to print, the image comes out beautifully and there isn't so much ink that it smudges or is affected by pencils/alcohol markers.

Thank you for popping along today,
Happy crafting
love from
Sue...xxx

Saturday, 29 April 2023

Stamping Bella - Spring/Summer Release Showcase. (Curvy Girl Plays Tennis & Summer Bundle Girl With Beach Ball)

Happy Saturday friends,
I hope you're having a lovely day!
We have blue skies and sunshine for the first time in weeks! - just in time for May Day Bank Holiday!

I'm here today as a Stamping Bella Guestabella to show you some cards from the recent Spring/Summer release.

Elaineabella and the lovely Bella's are having a showcase weekend and I am happily and proudly joining in! - Thank you so much to the Bella's for having me! (:

Ingredients from Stamping Bella
(Uk friends you can purchase these goodies from Dies To Die For)

Ingredients from Dies To Die For

Skin E04, E11, E00, E000
Hair E47, E44, E43
Blues B39, B06, B02
Blue/Greens BG49, BG15, BG13
Greens YG17, YG03, YG01

Ingredients from Stamping Bella
(Uk friends you can purchase these goodies from Dies To Die For)

Ingredients from Dies To Die For

Skin E04, E11, E00, E000
Purples BV08, V17, BV11, BV31
Blue/Greens BG49, BG15, BG13
White/Grey BV31, BV11
Puppy W2, W0, BV31

Thank you for popping by today!

Hope you all have a smashing weekend!

from Sue...xxx 


Friday, 7 January 2022

Whimsy Stamps - Heart Border Stamp and Die Combo

 Hello everyone!

I'm back today with some more
January Release gorgeousness!

I have used the new
and put it with an older Whimsy Stamps goodie!
I created the background with some sparkly watercolours and the stamped the heart die over the top.  I then cut the design into a 12 cm square.  

I cut a second piece of card into a square of the same size and die cut it with the heart die.  I layered the die cut over the heart design and fixed it down with foam tape.

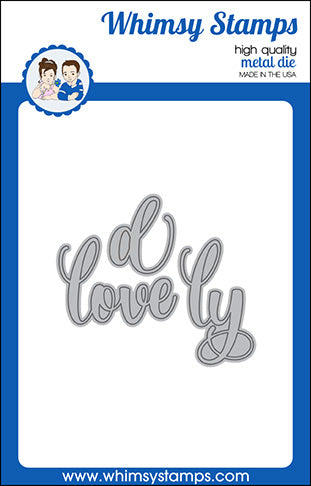
I then die cut in white card the beautiful
and 

Finally I added some sequins very similar to the gorgeous

Thank you for visiting me today!
Happy creating
from Sue...xxx

Ingredients from Whimsy Stamps *

**NEW Heart Border Rubber Cling Stamp and Die Combo - Whimsy Stamps **NEW You Word Die Set - Whimsy Stamps **NEW Love Word Die Set - Whimsy Stamps
Crafty Foam Tape WhiteSparkletz - Mermaid


Other Ingredients
300gsm White Card
Crafter's Companion Sparkle Pens
Sequins
Gemini Jnr Die Cutting Machine


Please note that in order to assist with the running of this blog I do use affiliate links from time to time and there may be some in this post, denoted with a *.  I only work with products I love and my opinions are my own.
Please see my About Me page for more information.


Tuesday, 4 May 2021

Whimsy Stamps - Mermaid Dreams - Tuesday Tutorial

  Hello everyone,

Oh my word - these Tuesdays come round quickly don't they! - I swear time is speeding up! 

Today I'm sharing a sweet, (VERY sweet)! (; tutorial!
I'm going to keep you guessing today so if you don't read ahead you'll have a nice surprise - unless you can guess what I've made! 

If like me you adore Mer-May then Whimsy Stamps has got you covered!!
I decided to try something a little different with two of the fabulous Whimsy Stamps mermaid stamp sets.
and the 
Ingredients from Whimsy Stamps

Other Ingredients
Cling Wrap
Watercolour Card
To create the inky background for my project I used (Watercolour) Sparkle Pens but you could use any sort of watercolour pens or watercolour medium for this technique. 
Black Stazon Ink
Mini Mister or Spray Bottle
Precision Scissors
Cocktail Sticks
Glue (I used a cold glue gun) 
First I placed a piece of cling wrap on my glass mat and scribbled and dotted some inks in blue, turquoise and pink onto it.
I then sprayed water onto a piece of A4 watercolour card.
I then placed the inky cling wrap onto the card, pressed it down and scrunched it up slightly.
I took the cling wrap away and this was the effect...
I repeated this with a different selection of mermaid type colours!
I ended up with two inky deliciously inky backgrounds.
Then I randomly cut the card up into about odd shaped pieces - don't overthink this, just dive in with the scissors, random is best!  I cut the card into about eight pieces in total.
I then stamped the mermaid tail from the Mermaid Dreams  stamp set onto the inky card.
I use Stazon Ink for this as it works best on top of watercolours.  It doesn't bleed and it leaves a crisp outline.
I stamped six tails in total and the gorgeous mermaid from the Lets Be Mermaids stamp set.  (You can see I also stamped the seashells but I decided not to use them this time)
I then fussy cut the mermaid tails (not my favourite part but I'm getting better at it - (I'm a bit of a muppet because I have a Scan n Cut - I'm just too lazy to get it out and set it up)!
Make sure you keep all the off cuts - you will need them later!
I coloured the mermaid with Copic Markers
Hair - E47, E39, YR27, YR24, YR21
Skin - R20, E04, E11, E00, E000
Tail - B39, BG07, BG15, BG01, BG11, YG00, White Gel Pen
I then fussy cut her...
Here's where you need the offcuts I said to save earlier! - I used the smallest and second smallest dies from the Wavy Nested Frames Die Set to cut shapes from the tail offcuts.
I then stamped a selection of sentiments from the Mermaid Dreams and Lets Be Mermaids stamp sets onto them (again with Stazon Ink)
Here is my lovely selection of tails, sentiments and a mermaid!
I used a glue gun to fix a cocktail stick to the back of each shape.  (You could use PVA but I'm impatient and I used the glue gun because it dries so quickly)!
...so, if you have n't already read ahead, can you guess what these are for! (;  ...

...well I did say it was a sweet tutorial! (:

I had a bit of a time deciding which stamp set to use for the cupcakes!  I uuuummed and aaaaaahed over using...  
Unicorn Wishes Clear Stamps - Whimsy Stamps 
or
Over the Moon Clear Stamps - Whimsy Stamps

...and I already have a few more ideas up my sleeve for halloween! (;

Thank you so much for popping by today!  I hope you've enjoyed my tutorial, it would be great to see your projects so remember to share them with us!

look after yourselves and those you love!

Happy creating from Sue...xxx

Mermaid Dreams Clear Stamps - Whimsy Stamps Let's Be Mermaids Clear Stamps - Whimsy Stamps Wavy Nested Frames Die Set - Whimsy Stamps


Please note that in order to assist with the running of this blog I do use affiliate links from time to time and there may be some in this post, denoted with a *.  You can use these links at no cost whatsoever to yourself. 
I only work with products I love and my opinions are my own.

Wednesday, 3 March 2021

Glorious Easter - Savior Sentments Whimsy Stamps

 Hello everyone,

I hope this week is being kind to you.

I had a lovely morning's crafting last week making some quick Easter cards with two beautiful new products from Whimsy Stamps
I may have said before that I am a total hoarder and I never throw away bits of inky card - well this is the reason why!

I sorted through my scrap card box (yep I have a box!) /-: - and found a few pieces of card that I thought would look great with the Savior Sentiments.

I then die cut the inky pieces with a selection of shaped dies - I also got to use some of the smaller dies in these sets which does nt happen very often!

I stamped sentiments from the Savior set on to the inky card and fixed them to a piece of white watercolour card.

I added other sentiments in grey ink around the edges of the designs and then added some sequins.  If you wanted something similar you could use 
or

Finally I layered the design onto a second slightly larger piece of white card.
I added a die cut from the 
to create the card above.
Ingredients from Whimsy Stamps
Thank you for popping by...
Happy creating
love from
Sue...xxx

**NEW Savior Clear Stamps - Whimsy Stamps **NEW Savior Die Set - Whimsy Stamps
Pierced and Stitched Circles Die Set - Whimsy Stamps Wonky Stitched Rectangles Die Set - Whimsy Stamps Rounded Rectangles Die Set - Whimsy Stamps
Sparkletz - Salt Water - Whimsy StampsSparkletz - Snow Crystals - Whimsy Stamps


Other Ingredients


Please note that in order to assist with the running of this blog I do use affiliate links from time to time and there may be some in this post, denoted with a *.  I only work with products I love and my opinions are my own.
Please see my About Me page for more information.