Hello everyone
I hope you are all enjoying a peaceful Easter weekend!
I hope you are all enjoying a peaceful Easter weekend!
I have a tutorial for you today, to show you how to create a masked Copic airbrush background and also how to colour some rather cute bunnies to go with them.
Here are the craft items I used -
a Copic Air System,
Copic Markers FBG2, BV04, V04,
Make It Colour Blending Card
Three masks created with die cut shapes from heavy weight card,
a selection of Mama Elephants gorgeous Honey Bunny stamped images.
It is also really important to cover your desk otherwise everything will be airbrushed!
I have discovered I can use my MISTI as a base for securing images for airbrushing!
I cover the MISTI magnetic base with paper and place the card and the mask (or stencil) on the paper and fix it down with the MISTI Magnets! The MISTI stays clean because it is covered in paper and I have a spare set of magnets I only use for airbrushing!
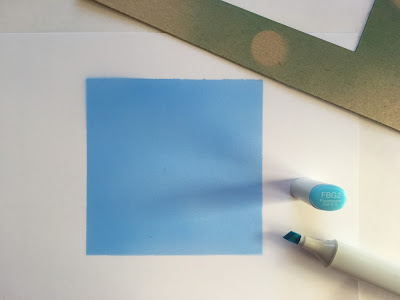
I covered the white card with the square mask and fixed it down. Then I then started airbrushing in FBG2, slowly and steadily to cover the card.
I repeated this again with the heart and circular shaped masks. (I then die cut them to use as card backgrounds later).
I decided it would be nice to create a pattern on one of the airbrushed backgrounds with a stamp
When creating a background stamped with Colourless Blender It is important to work quickly as the Colourless Blender will evaporate quite rapidly.
It's a good idea to get everything ready before you put the blender in the pot!
When creating a background stamped with Colourless Blender It is important to work quickly as the Colourless Blender will evaporate quite rapidly.
It's a good idea to get everything ready before you put the blender in the pot!
I used a super size dauber by Tsuksienko to apply the blender to the stamp, it holds quite a lot of blender and I was able to cover the stamp quickly.
Then I stamped the background onto my airbrushed design. The secret here is to make sure you haven't used too much blender and you don't press down too hard. A light touch will be all you need to apply the blender to the design.
Your design will now look something like this - I absolutely love it when I see the design the Colourless Blender has created - Colourless Blender really is one of my favourite Copic products!
I love this background stamp so much I think I might use it on everything! (:
Next, I assembled the colours I needed to colour the bunnies.
W00, W1, W2, W4, W6 & C00, C1, C3, C5
I started to colour the areas where I want the darkest part of my image to be with a W2. This primes the card and makes it easier to blend the darker colours; it basically creates a base for the pigments in the alcohol solution to move about on.
I then colour with W6 where I want the darkest part of my image to be.
Then I used W4 to blend out the W6
...and then W2 to blend out the W4 towards the light.
(I then repeat all these steps to create a good definition between the darkest and lightest parts of my image)
Finally I colour with my lightest marker W00 where I want the lightest part of my image to be.
I had such fun doing this! It would be great if you could try this too and show us your cards at
HERE.
from Sue...xxx
Then I stamped the background onto my airbrushed design. The secret here is to make sure you haven't used too much blender and you don't press down too hard. A light touch will be all you need to apply the blender to the design.
Your design will now look something like this - I absolutely love it when I see the design the Colourless Blender has created - Colourless Blender really is one of my favourite Copic products!
I love this background stamp so much I think I might use it on everything! (:
Next, I assembled the colours I needed to colour the bunnies.
W00, W1, W2, W4, W6 & C00, C1, C3, C5
I started to colour the areas where I want the darkest part of my image to be with a W2. This primes the card and makes it easier to blend the darker colours; it basically creates a base for the pigments in the alcohol solution to move about on.
I then colour with W6 where I want the darkest part of my image to be.
Then I used W4 to blend out the W6
...and then W2 to blend out the W4 towards the light.
...and the same with W1
Finally I colour with my lightest marker W00 where I want the lightest part of my image to be.
Finally I added a cast shadow under the bunny's chin with W8
Here are the cards I created with the Copic backgrounds and bunnies!
Ingredients (From Dies To Die For)
Stamps - Mama Elephant Honey Bunny Stamp Set
Other Ingredients
Make It Colour Blending Card by Elaine Hughes Marker Geek
Copic Markers
Black Glitter Card by Crafter's Companion
Copic Marker Europe on Facebook.
To find us just follow the link
Thank you for popping by.
Happy Copic colouring
from Sue...xxx


