Sunday, 3 February 2019

You are dino-mite!...

Hello everyone,

oh my - it's frozen solid here today, very pretty to look at but blooming' cold!

I'm here today with the final day of new release gorgeousness from 

This card is made with 
To make my card I created a card base with polka dot hearts design paper.

I used the Peekaboo Window 3 Die to cut the stitched panel for the top half of the card and  stamped a background stamp in fadeout ink which I coloured with Copic markers.
Sky B000, B00
Mountains C0, C1, C3
Grass YG17, YG13, YG11
Trees YG25, G94, E23, E57, G46, G28

I stamped the cute dinosaur in black ink and coloured hm with Copics too.
YR 15, YR18, YR59, R27, R24.  Then I fussy cut him/her (:

I stamped the sentiment in black ink onto white card and die cut it with a banner die.  I also embossed and banner die cut a piece of vellum.
Finally, I layered the background, the dinosaur and the banners onto the card base as shown!

Thank you for popping by!

Be sure to pop to 
to see the gorgeous DT creations there and then to 
to engage in some essential retail therapy!

love from Sue...xxx


...and I am hoping to join in regularly with this wonderful colouring community!  

Saturday, 2 February 2019

Adopt don't shop!...

Hello friends,

Hope you are having a lovely Saturday!

I'm back today to show you another gorgeous 
new release stamp set
To make this card I stamped the dogs in black ink and then masked them and blended Distress Inks in  Twisted Citron, Scattered Straw and Worn Lipstick to create the background.  I splashed water on the inks and let it dry.

I peeled the mask away and coloured the Adopt Don't Shop Dogs with Polychromos pencils.

I die cut the image with Hand Stitched Nested Rectangles and layered it onto a piece of design paper.

Then I die cut a banner and stamped the sentiment onto it with black ink.  I fixed this to the bottom of the card design as shown.

Finally I randomly dotted some Star Dust Stickles above the dogs.
I loved making this card as rescue dogs are a subject very close to my heart!

We have two - or gorgeous Ruby and Phoebe and are about to have a third, a beautiful little GSP boy called Neo!


Thank you for popping by!

Be sure to pop to 
to see the gorgeous DT creations there and then to 
to engage in some essential retail therapy!


love from Sue...xxx


  ...and I am hoping to join in regularly with this wonderful colouring community!          

Friday, 1 February 2019

There Might Be Angels...

Hello everyone!

Happy 1st February!

Which mean it's the first day of the fabulous new releases from wonderful

The first card I am sharing with you this week is made with the utterly gorgeous
Angel Nevaeh Rubber Stamp
by Marina Fedotova
To make this card I stamped gorgeous Angel Nevaeh with black ink.  
I die cut her with a Hand Stitched Nested Rectangles Die slightly off setting her to the left hand side.

I coloured Angel Nevaeh with Copic Markers as shown.
Skin V12, E93, E000, R20
Hair YR23, E99, E29
Frock B39, B37, B34, V12, V15, V17 White Gel Pen
Wings BG000, V00
Stars Blue Copic Glitter Pen

Next, I die cut a Stitched Cloud and used it to mask the background and apply Tumbled Glass Distress Ink.

Then I tore a strip of vellum and embossed it with a clouds embossing folder.  I layered the strip and the coloured image onto a piece starry design paper.

I added the sentiment from the beautiful Beaucoup Bouquet Clear Stamps Sentiment Set.

Finally I embellished the background with some super sparkly
Thank you for popping by!

Be sure to pop to 
to see the gorgeous DT creations there and then to 
to engage in some essential retail therapy!

love from Sue...xxx


...and I am hoping to join in regularly with this wonderful colouring community!

Wednesday, 30 January 2019

Lovely friends...

Hello everyone,

Happy Wednesday!

I had such fun making this card with the beautiful
by Stamping Bella
To make this card I first created the background by stamping and heat embossing in white the Stamping Bella Love Back Drop.

Then I blended Distress Oxides in Shaded Lilac and Peacock Feathers over the background, (the white embossing resists the distress colours), and sprinkled the background with water and Perfect Pearls.

I stamped and die cut gorgeous Raven and coloured her with Polychromos in purples and pale blue/greens as shown.

Finally I added some Stickles to the bow and the background.

This is the most difficult piece of pencil colouring I have tried so far and I am really happy with how she came out!
Thank you for popping by!

Happy Crafting
love from Sue...xxx

Tuesday, 29 January 2019

Thyroid Awareness Month Blog Hop...

Hello friends, 

I'm here today with a special blog post, part of a massive month long hop arranged by my lovely crafting friend
Milka Gubo

26 designers (including me) from all over the World have gathered for this special blog hop, which has taken place from January 5th until January 30th.  Each day one designer has shared a handmade project on her blog.  (Please see entire blog hop list below).

The aim of the hop is to support Thyroid Awareness Month, January, and to raise public awareness of the importance of the Thyroid Gland and the problems it can cause when it's not working properly.

The Thyroid Gland looks like a butterfly and that has been adopted as the symbol for Thyroid Awareness Month.

All the cards made for this cause have a butterfly theme.
 I chose the beautiful image
Babette The Butterfly by Stamping Bella 
This blog hop is not sponsored by any artist or company. Instead, there will be couple giveaways on a couple of the blogs along the way
I won't reveal the designers who will have giveaways on their blogs, you'll have to find that out yourself so be sure to visit each designer to find out if they are offering a prize, details about prizes and how those prizes can be won.

Thank you for hopping by!
love from Sue...xxx

Monday, 28 January 2019

Old Geezer!...

Hello friends, 

Hope it's a Happy Monday!

I'm here today to show you some fabulous goodies from 
January release!

To make this card I first stamped the Buffalo Plaid Background Rubber Cling Stamp and heat embossed it in black.

Then I blended the background with Distress Ink Pads in Cracked Pistachio, Peacock Feathers and Chipped Sapphire.

I created the background for the Old Geezer by lightly blending the same distress inks onto a piece of card, sprinkling it with water and splattering it with black acrylic paint.

I repeated this on a second piece of card and then die cut the Old Fart Word Die.

I stamped the Old Geezer Clear Stamp in black ink and coloured him with Copics, adding the plaid pattern to his jacket and slippers with a black fine liner and a white gel pen.

I square cut the plaid background and the blended background and layered them together then I added the old fart die cut and the old geezer as shown!

Finally I die cut one of the strips from the New Quick Strips Die Set and stamped the Happy Birthday sentiment from the Old Geezer Clear Stamp set onto it.

I trimmed the strip slightly and fixed it to the top right hand side of the card design as shown.
Thank you for popping by!


Be sure to pop to 
to see the gorgeous DT creations there and then to 
to engage in some essential retail therapy!

love from Sue...xxx


Wednesday, 23 January 2019

Oh happy day...

Hello friends,

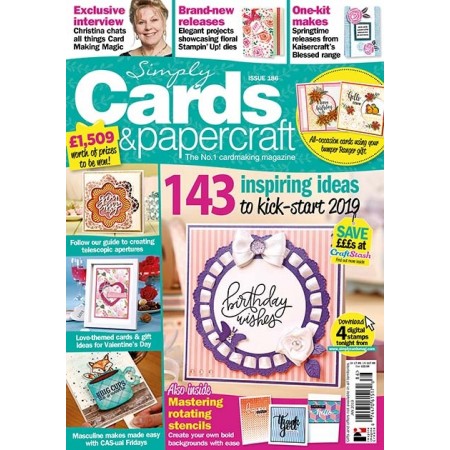
I was thrilled recently to be asked to complete a project for January's Simply Cards and Papercraft Magazine, to make a set of cards for a new arrival!

I chose to use a beautiful stamp set by Deb Davis from

To make this card I stamped and coloured the cute bunnies with Copic Markers and fussy cut them.

I created the card background by layering some gingham papers and adding die cut clouds
and stars.

The January issue of Simply Cards and Papercraft is available in stores now or by following this link
Thank you for popping by!


Be sure to pop to 
to see the gorgeous DT creations there and then to 
to engage in some essential retail therapy!

love from Sue...xxx