Thursday, 8 November 2018

Make a Wish...

Hello everyone!

Happy Thursday...xxx

Today's card is a special one made for a special friend's Birthday!
Thank you to Julia Altermann for the inspiration!
Ingredients
Sentiment - Whimsy Stamps - Beaucoup Bouquet Sentiments by Deb Davis (UK Peeps you can buy these from Dies To Die For
Neenah Kraft Card - Desert Storm
MFT Hybrid Ink Pad in Extreme Black
Copic Markers
White Polychromos Pencil
Gold Glamour Dust
Twine
Sequins
Copics - 
Mouse W7, W6, W4, W2, W00, R02, R01
Frock R59, R29, R24, R14
Leaves FYG1, YG21, YG93, YG95
Dandelion/socks - YR15, YR14, YR61

Thank you for popping by!

Happy crafting
love from
Sue...xxx

Friday, 2 November 2018

Sleigh Ride...

Hello friends
I'm back today to show you another gorgeous new release image from 
It's a beautiful rubber stamped image by Jennifer Dove
Isn't it a gorgeous image, completely evokes winter for me!

Ingredients
MFT Hybrid Ink Pad in Extreme Black
Copic Markers
Quickie Glue Pen
Diamond Dust
Papers - Echo Park Winter Wishes 6 x 6 Pad
Collall All Purpose Glue

Copics
Sky RV00, RV0000, B0000, C0
Church E41, E42, E43, E44, Windows Y11, Y38
Fir Tree G28, 
Tree E49, E29, E23
Sleigh BG96, BG93, W1
Horse E77, E74, E71
Clothes, R59, R56, R45, B97, B95, B93, E41, E42, 
Snow W5, W3, W1, Colourless Blender
Be sure to pop to 
to see the gorgeous DT creations there and then to 
to engage in some essential retail therapy!

Thank you for popping by,
Happy creating! 


love from Sue...xxx


Thursday, 1 November 2018

Snowy Trees...

Hello everyone...

it's the 1st November which can only mean we are starting another week of 
gorgeousness!
I am not usually very proficient with dir cuts but I could n't resist using the aperture from this gorgeous die by Crissy Armstrong
...and the sentiment is from a fabulous new set of clear stamps by Deb Davis
Ingredients 
Black Card
Strathmore Bristol Vellum Card
Tim Holtz Distress Oxides in Blue Jeans, Broken China and Cracked Pistachio
Emboss Pod
White Embossing Powder
Chunky White Embossing Powder
Be sure to pop to 
to see the gorgeous DT creations there and then to 
to engage in some essential retail therapy!

Thank you for popping by,
Happy creating! 

love from Sue...xxx


Tuesday, 23 October 2018

For unto us a child is born...

Hello everyone

I'm whizzing buy today with something inky! (:

I absolutely adore this gorgeous 
 stamp set
It has so many possibilities crafty possibilities for Christmas creations!
I masked of the centre of the card in a rectangular shape and painted a blue watercolour wash in the aperture.

Then I stamped the images and sentiment from the gorgeous 
stamp set in black ink 
and mounted the design on a piece of black glitter card.  I'm sorry the glitter card does nt show up too well - you'll have to take my word for it that it's looks gorgeous! 
Finally I added some stars with a white gel pen.
I am definitely going to do this style of card again with some of the other beautiful images from the stamp set.
Ingredients from
Hand Stitched Nested Rectangle Dies (for the masked aperture)

Other Ingredients
Watercolour card
Blue Watercolour Ink
White Gel pen

Be sure to pop to 
to see the gorgeous DT creations there and then to 
to engage in some essential retail therapy!

Thank you for popping by,
Happy creating! 

love from Sue...xxx


Thursday, 18 October 2018

Giraffe advice!...

Happy Thursday lovely friends

Here's some advice from a Giraffe...

Stand tall
Eat fresh greens
Don't be afraid to stick your neck out
Preserve wild places
Be head and shoulders above the rest
Reach for new heights 
Keep your chin up

Fab isn't it!
Ingredients from Whimsy Stamps
Other Ingredients
Neenah Desert Storm Kraft Card
Faber Castell Polychromos
Burnt Sienna 283, Burnt Ochre 187, Yellow Ochre 183
Black 199, Nougat 178
Earth Green Yellowish 186, Olive Green Yellowish
Vellum,
Fall Sentiments by Stamping Bella
Emboss Pad and Back Embossing Powder
MFT Wild Print 6 x 6 Paper Pad
Paper Doily
Wooden Button and Twine


Be sure to pop to 
to see the gorgeous DT creations there and then to 
to engage in some essential retail therapy!

Thank you for popping by,
Happy creating! 

love from Sue...xxx


Tuesday, 16 October 2018

31 Nights of Halloween with Whimsy Stamps (Boo)!...

Oh my word - there are some super spooky things going on at wonderful 
I am here tonight with a fa-boo-lous stamp set from Deb Davis
In all honesty you could make dozens of cards with this amazing set and just never get bored!
I had fun!  I also used  Woodgrain background stamp to make the coffin lids!  
Ingredients from Whimsy Stamps
UK Peeps you can buy all these goodies from Dies To Die For
Stamps - Halloweeners
Be sure to pop to 
to see the gorgeous DT creations there and then to 
to engage in some essential retail therapy!

Thank you for popping by,
Happy creating! 

love from
Sue...xxx

Tuesday, 9 October 2018

Graduated Colour Background - Too cute!...

Hello friends,

I'm here today to show you a really easy background technique with Copic Markers, Colourless Blender and some 
Whimsy Stamps 
new release gorgeousness!

Here are the things I've used...
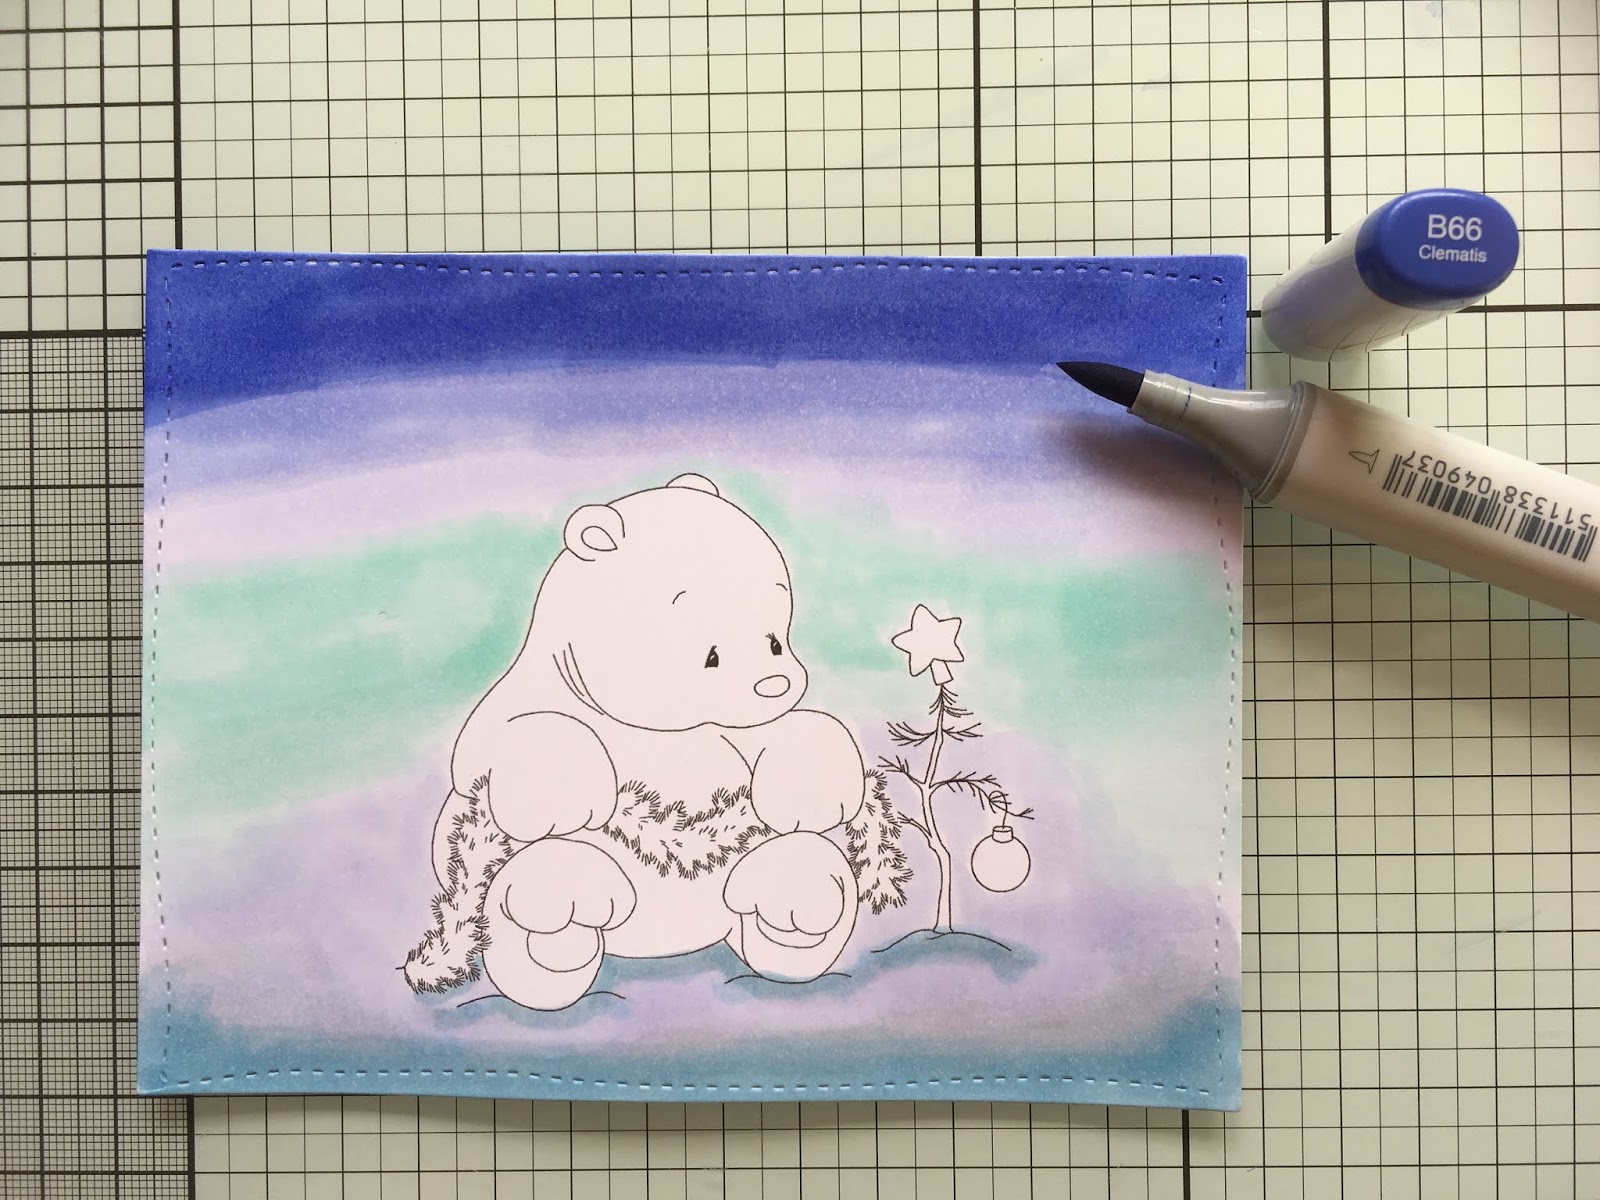
Whimsy Stamps Polar Bear's Christmas Tree Rubber Stamp on Make it Colour Blending Card by Elaine Hughes,
Copic Markers - B66, B63, B60, BG11, BG10, C2, B52, Colourless Blender refill and a natural sponge.
I started by colouring across the bottom of the design with B52
 ...then with C2...
 ...then B60... Don't worry about it looking messy, this will soon be fixed!
Then I started colouring across the top of the page with B66...
...then B63...
...then B60...
 ...then BG11...
 ...then BG10...
and B60, again, do not worry about it not looking neat and well blended.
I then repeated all of the above steps, colouring the background once more in exactly the same way.


I'm sure you are all thinking Sue has lost her mind to be showing us such streaky Copic colouring but I promise you this will work out fine! :)
The next step is to dab the background all over with a sponge dipped in Colourless Blender.
I did several layers of this, letting the blender dry between each application.
You will end up with something that looks like this, with lots of texture in the background
I finished the colouring the image with Copics.


I finished my card by sprinkling some Perfect Pearls on the background to add some shimmer, mounting the design on glitter card and adding a silver bow!
Ingredients from Whimsy Stamps 
UK friends you can buy from Dies To Die For
I hope you have enjoyed this tutorial!

It would be great to see your graduated colour backgrounds! Please share your cards with us at Copic Marker Europe by following the link 
Be sure to pop to 
to see the gorgeous DT creations there and then to 
to engage in some essential retail therapy!

Thank you for popping by,
Happy creating! 
love from Sue...xxx