Hello everyone!
Today I am joining in with a fab and fun instagram hop
with
I have used some gorgeous products and I'll do a list for you later in this post!
I had such fun creating this underworld scene for this gorgeous mermaid!
I stamped the Sweet and Salty Clear Stamps mermaid in black ink onto a piece of card suitable for alcohol markers and coloured her with Copic markers. (I'll list the colours I used at the end of this post). I then fussy cut her and set her aside.
I created the background by running a piece of white water colour card thorough the Slimline Embossing Folder - Wave Lengths I then cut the card into a 8.25 x 21.5cm rectangle and swooshed some blue ink over it. I'll post a link to an earlier tutorial for this technique at the end of this post.
Then I die cut a piece of white water colour card with the Slimline Waves Die...
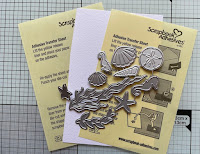
Next I created the elements for the undersea background with the Build an Ocean Die Set and Scrapbook Adhesives Transfer Sheet.
I fixed a piece of adhesive transfer sheet to both sides of a piece of watercolour card and die cut the build an ocean elements.
I then peeled the transfer sheet from the top side of the die cuts and sprinkled them with clear and blue glitter.
I used my finger to burnish the glitter slightly so it stuck well to the background.
I then peeled the transfer sheet from the back of the die cuts and fixed them to the card design.
I then used the Build an Ocean Die Set and the Scrapbook Adhesives 3D Foam Creative Embellishment Kit to make some extra shells for the undersea background.
I then gently rubbed the foil with my finger until it came away from the backing, I was left with a beautiful shiny silver shell.
I fixed all the elements to the card design and finally added the mermaid using the EZ Dots runner - brilliant! The teeny tiny dots stuck to the fussy cut mermaid's intricate parts and made fixing her down so much tidier and easier!
I used the Wavy Nested Frames Die Set, a sentiment from the Sweet and Salty Clear Stamps set and Scrapbook Adhesives 3D Foam Dots to create the sentiment panel.
I used the Wavy Nested Frames Die Set, a sentiment from the Sweet and Salty Clear Stamps set and Scrapbook Adhesives 3D Foam Dots to create the sentiment panel.

I stamped the sentiment onto the die cut and fixed it to the card design with Scrapbook Adhesives 3D Foam Dots.
Finally I added some Starry Sky Spakletz.
Ingredients from Whimsy Stamps
Thank you for popping by today!
Hope you are all keeping well, look after yourselves and happy creating...
love from
Sue...xxx
Now here's the important info so you can join in with our instahop and try and win a gift voucher to treat yourself to some Whimsy Stamps and ScrapBook Adhesives by 3L goodies!
The best place to start is on my instagram feed which you can find by following this link
or by using your own instagram app and searching for me
@tanglemousecards
If you then look at my insta post featuring the insta hop banner and this card you will see all the hop instructions and be good to go!
Happy hopping and good luck!
Other Ingredients
Sea - BG000, BG41, BG52, BG45
Sand - E50, E40, E41, E43
Skin - E04, E11, E00, E000, R20, R00
Hair - BV02, BV13, BV04, BV17, BV29
Tail - BV02, BV13, BV04, BV17, BV29, BG11
Clam Bra - C3, C1, C0
Link to Swoosy Inky Background Tutorial can be found
Please note that in order to assist with the running of this blog I do use affiliate links from time to time and there may be some in this post, denoted with a *. You can use these links at no cost whatsoever to yourself.
I only work with products I love and my opinions are my own.
Please see my About Me page for more information.


1 comment:
its fabulous!
Post a Comment