Hello everyone!
I'm here today with a fiendish tutorial involving gorgeous
Whimsy Stamps - Halloweeners stamp set and some frightful colouring! (: o:
Whimsy Stamps - Halloweeners stamp set and some frightful colouring! (: o:
As it is now the time of year when we all love colouring ghosts, snowmen, polar bears I thought I would show you how I colour white with my Copics!
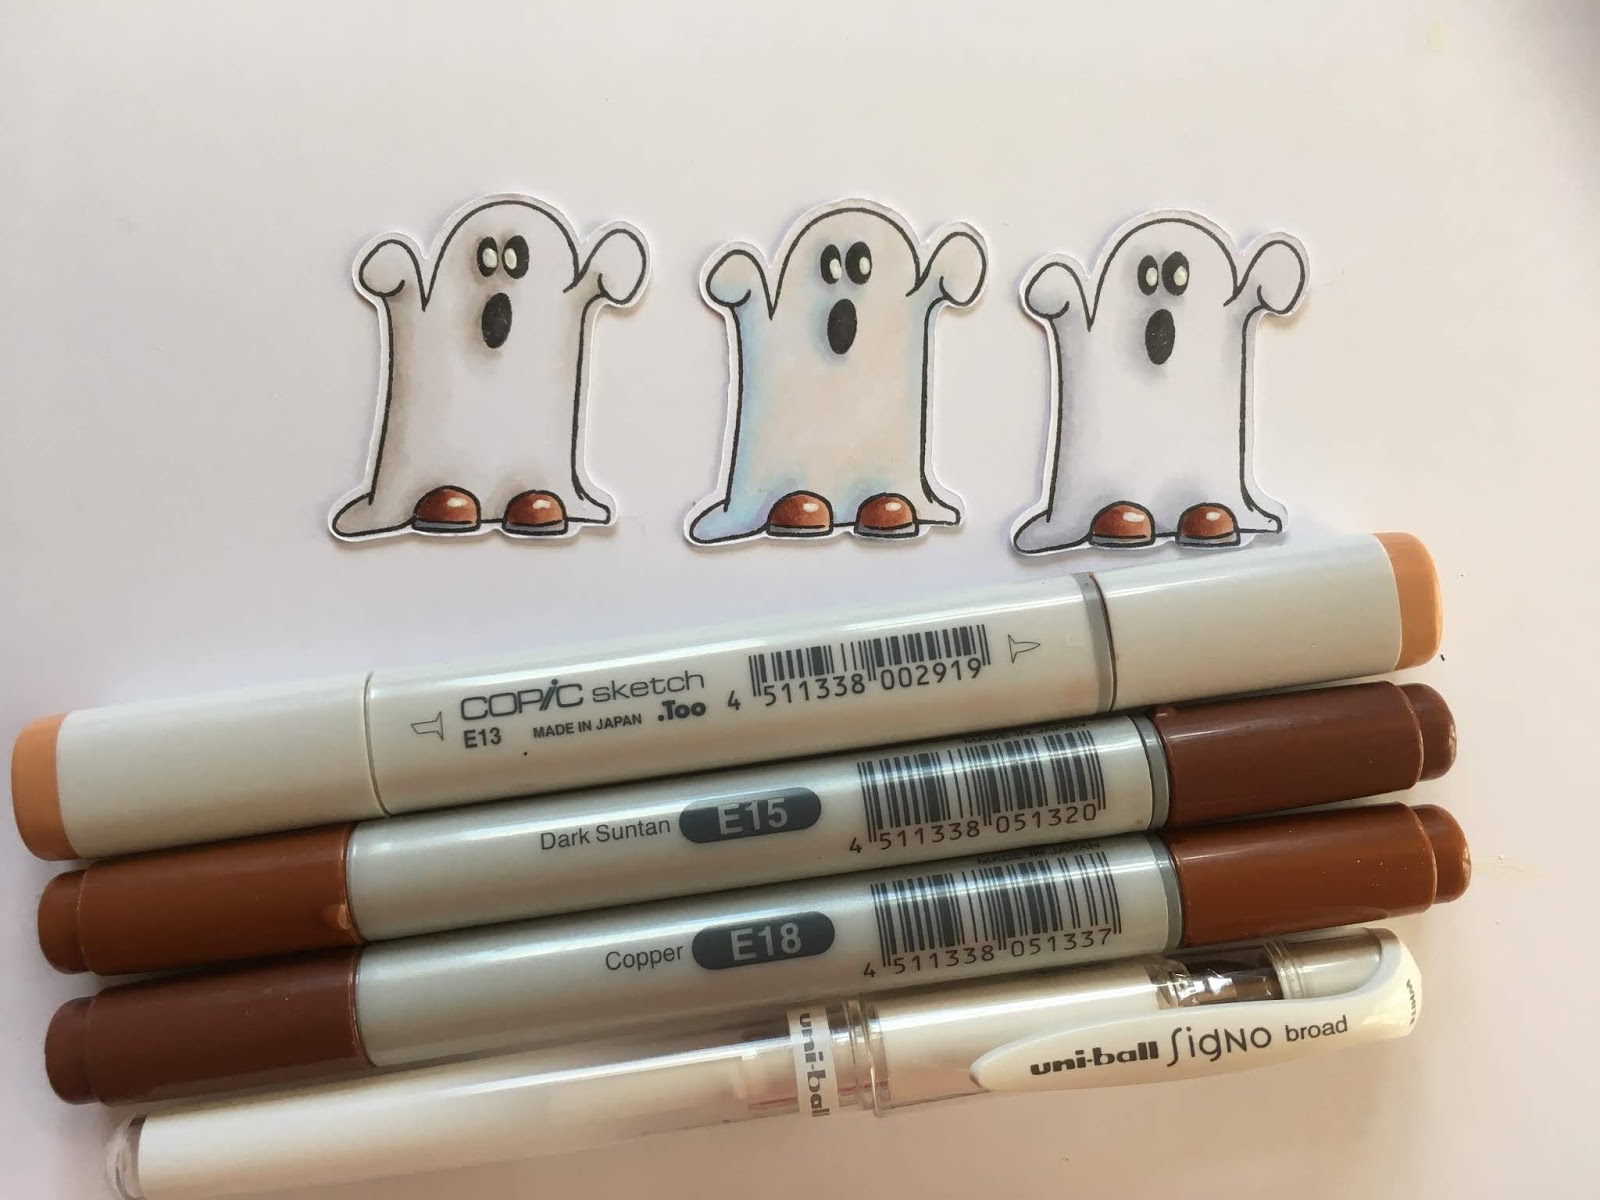
The items I have used for this colouring technique are -
The ghost stamp from Whimsy Stamps - Halloweeners Clear Stamps
Make It Colour Blending Card by Elaine Hughes - Marker Geek
MFT Hybrid Ink Pad in Extreme Black
Copic Markers
W3, W1, W0
C3, C1, C0
BV00, B000, B0000
and 0 Colourless Blender
 I decided to colour three ghosts each in different shades to represent white,
Ghost number 1!
 I coloured the areas where the darkest part of my image would be in W00 to provide a base for the darkest colour I'll be using.
It helps to remember that when you colouring something to look white you are not colouring the white areas you are colouring the shaded areas. My light source is coming from the top right hand side.
The items I have used for this colouring technique are -
The ghost stamp from Whimsy Stamps - Halloweeners Clear Stamps
Make It Colour Blending Card by Elaine Hughes - Marker Geek
MFT Hybrid Ink Pad in Extreme Black
Copic Markers
W3, W1, W0
C3, C1, C0
BV00, B000, B0000
and 0 Colourless Blender

Ghost number 1!

It helps to remember that when you colouring something to look white you are not colouring the white areas you are colouring the shaded areas. My light source is coming from the top right hand side.


...then blended out the W3 with W1,

...then blended out the W1 with W00


Ghost Number 2

Again, my light source is coming from the top right hand side.


Ghost Number 3
(Thank you to Elaine Hughes - Marker Geek for the colour combination for this one)!
I coloured the areas where the darkest part of my image would be in B0000 to provide a base for the darkest colour I'll be using.
Again, my light source is coming from the top right hand side.

Then I coloured on top of the B0000 with BV00,


Here are my three ghosts so far! What do you think? Do you have a favourite?

I hope you have enjoyed this tutorial, colouring white is so useful, not only can you colour ghosts, snow, animals, you can also use exactly the same technique for colouring white clothes and flowers!
This is the project I made once I had finished my ghostly colouring!

Ingredients from Whimsy Stamps
Other Ingredients -
Frantage Trick or Treat Fragments
Halloween Charms
Baker's Twine
Thank you for popping by.
Happy Copic colouring
6 comments:
Fabulous little ghosties (not scary at all!) and I love the banner you've made with them.
I adore your banner Sue, what a lovely idea
Great tutorial, it's always hard to know what colours to use for images like this (snowmen come to mind too!)
I like the blue personally and I'll be trying that instead of just reaching for the greys
Have a good Sunday lovely friend
Anne x
Fabulous banner and love the little cute ghosts--great tips for colouring I love the blue one too
Carol x
Fantastic tutorial hun and I love the cute Halloween banner! You've also helped inspire me to craft again :) xxx
Oh Love it!
hugs
Wonderful tutorial and a really brilliant hanging decorations, perfect for Halloween - Michelle x
Post a Comment