Good Morning everyone,
It's Sue here today with something sparkly!
Last year I was asked to do a fun feature for the UK craft magazine, Making Cards.
I was asked to colour on glitter with my Copics!

This was such a fun technique I thought I would share it with you all.

Here is a photo of the ingredients I used to complete this super technique.

I stamped the image on to card with Tuxedo Black Memento Ink.

Then I used a piece of double sided adhesive sheet to completely cover the card.

I generously sprinkled glitter all over the card until it was completely covered and shook off the excess.

Then I rubbed my finger in small circles all over the card to firmly fix down the glitter.

This is the effect you will have. (Isn't this gorgeous! Don't be tempted to stop here though! It's time to get your Copics out)!

I then started to colour this sweet image using my Copics, starting with R83 to map out my darkest area. I coloured on the glitter in exactly the same way as usual to blend the colours and create light and shade.
The only thing I was careful with was to make sure I stopped colouring just inside the outline of the image so that the ink did not bleed into the glitter outside the image.
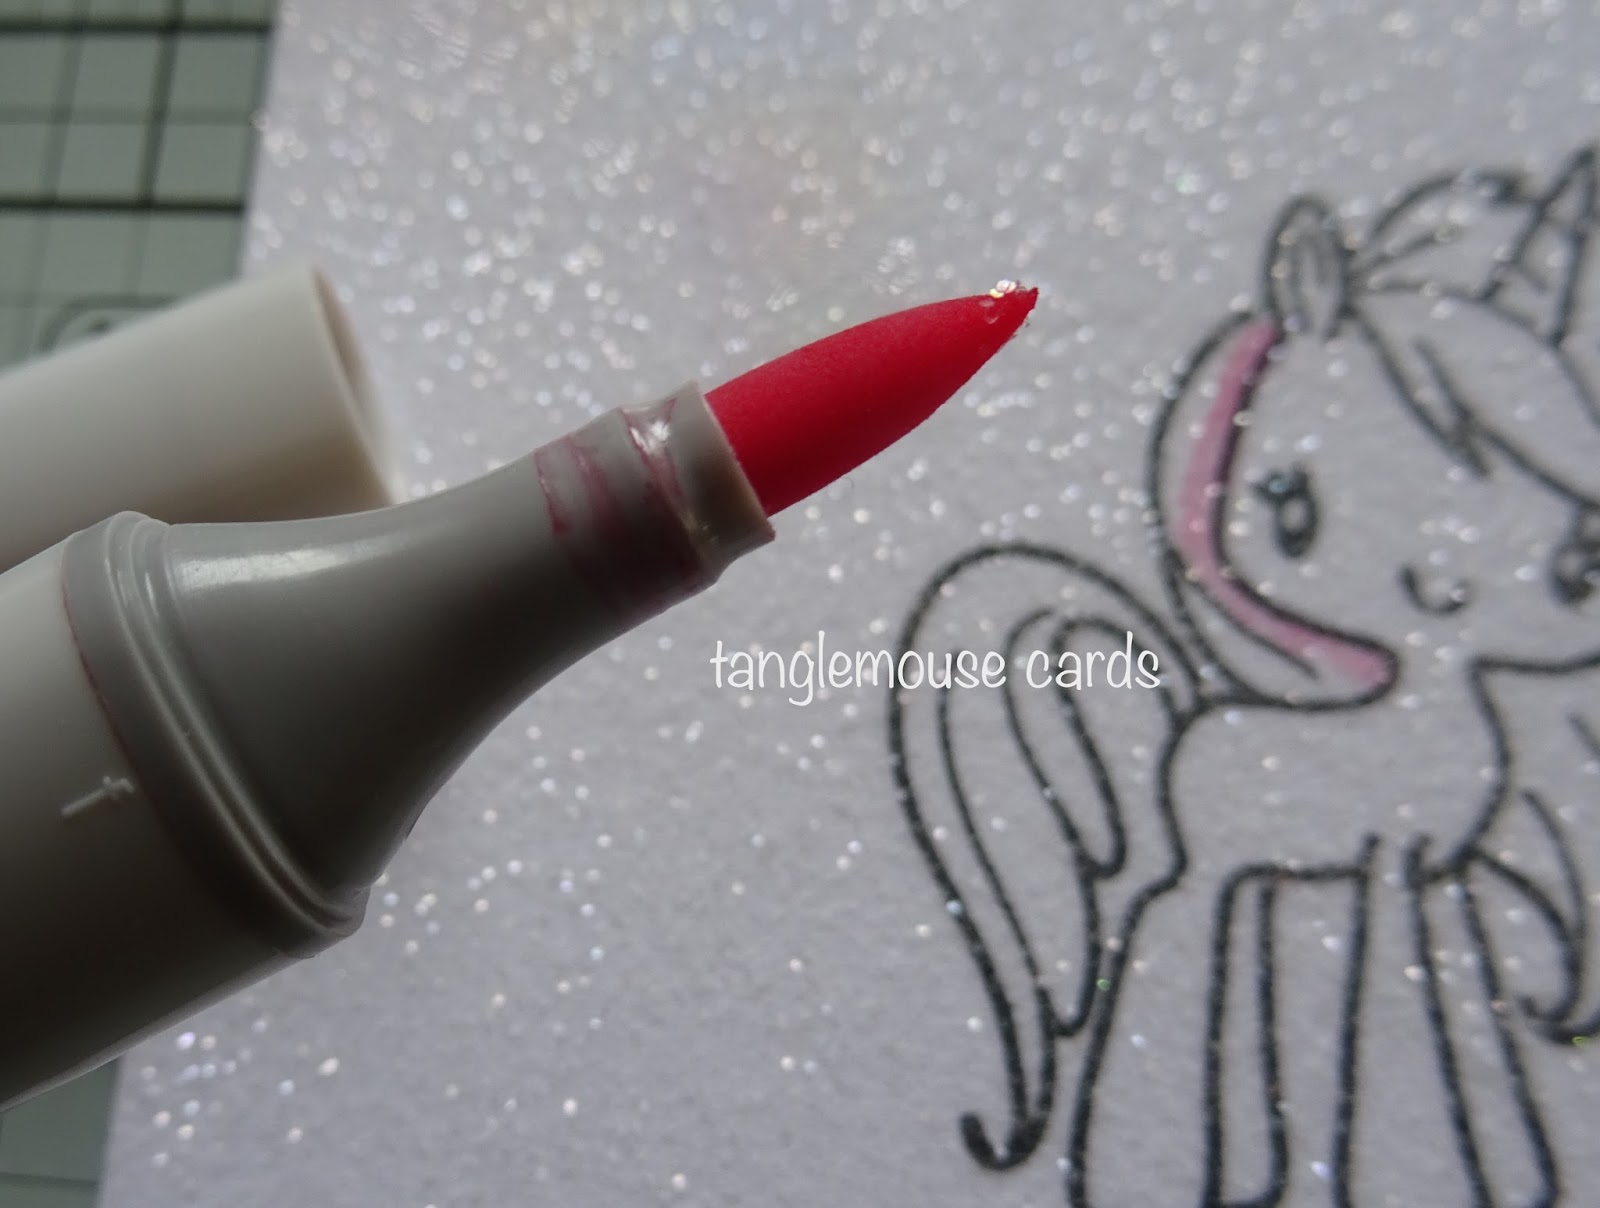
You will may see little bits of glitter sticking to the nib on your Copic marker. Don't be worried by this, it is not a problem.

I simply swooshed my nib in a little pot of Copic Cleaner and dabbed it dry on a piece of paper towel.

I carried on colouring with markers R59, R85, R83, R81 until I had finished the first piece of my image, this sweet unicorn's mane.

I carried on colouring with Copics, I was really careful to stop colouring just inside the outline of the image to prevent the colour bleeding into the glitter outside.

I hope you have enjoyed my tutorial. It would be great if you could try this technique and show your cards to us at Copic Marker Europe on Facebook.
To find us just follow the link
I coloured this pretty unicorn with some of my favourite Copic colour combinations
Mane and tail - R59, R85, R83, R81
Unicorn body - W5, W3, W1
Horn - B95, B93, B91
Ground - W3, W5, W1
Background - BG01, BG000, BG0000
Other Ingredients
from Dies To Die For
Stamp - The Greeting Farm - Magical Day
Rainbow and Sentiment from - MFT Magical Dragons
Banner - Lawn Fawn - Bannertastic
Sequins - Taylored Expressions Hello Happiness

Thank you for popping by.
Happy Copic colouring!
love from
Sue...xxx

11 comments:
Absolutely stunning colouring of that gorgeous unicorn on your sparkle Sue... and I do love the finished piece - the plaid paper picks out the colour beautifully.
Christine x
this is stunning!
great tutorial!
love your card!
Aww what a gorgeous card! I never knew you could colour onto glitter!
Lucy x
What a fab tutorial Sue, so easy to follow and the end result looks amazing xx
Oh gosh... how cute is this? It doesn't get any better than rainbows and unicorns! Great tutorial and a fab card.
Fantastic lovely, gorgeous colouring and such a lovely card xxx
Fabulous technique thanks for sharing the results are stunning Love and hugs Carole x
A brilliant technique Sue, love all that sparkle. Your card is gorgeous.
Lorraine x
fantastic technique Sue, awesome colouring too :) xx
Fabulous card and colouring great technique and I didn't know you could colour glitter either
Carol x
Looks fab hun. I've just left a comment on the Copic blog too. Great idea and a fab tutorial. xx
Post a Comment