Friday, 19 November 2021

SurReally Cool Christmas Slimline Paper - Whimsy Stamps

 Happy Fri-Yay friends!

Today I have some super quick cards to show you made with the absolutely gorgeous 
These came together really quickly and I could have made a lot more!  The paper pack is so beautiful and I thought the simple effect of adding the Believe die cut and a sentiment made the perfect and stylish card! (Not like me at all)  :)
Ingredients from Whimsy Stamps*

Thank you for popping by today!
have a fab weekend - and happy creating!
from Sue...xxx 


*NEW Slimline Paper Pack - SurReally Cool Christmas - Whimsy Stamps *NEW Believe Word and Shadow Die Set - Whimsy Stamps 
Simple Sentiment Strips Clear Stamps - Whimsy Stamps Quick Strips Die Set - Whimsy Stamps


Other Ingredients
Mirror Card
Black Card
WOW Slow Drying Embossing pad
WOW Gold Embossing Powder
Gemini Jnr Die Cutting Machine


Please note that in order to assist with the running of this blog I do use affiliate links from time to time and there may be some in this post, denoted with a *.  You can use these links at no cost whatsoever to yourself. 
I only work with products I love and my opinions are my own.


Thursday, 18 November 2021

Whimsy Stamps - Holly Slimline Embossing Folder

 Good morning all!

I hope this week has been kind to you!

Today I have a card to show you made with a fabulous 
Ingredients from Whimsy Stamps

Thank you for popping by today!
look after yourselves and happy creating!
from Sue...xxx

*NEW Slimline Embossing Folder - Holly Winter Pines Rubber Cling Stamp - Whimsy Stamps 
*NEW Sentiment Assortment - Merry Christmas Clear Stamps Slimline Scenic Countryside Die - Whimsy Stamps
Sparkletz - Hugs and Kisses - Whimsy Stamps


Ingredients From Dies To Die For

Other Ingredients
Strathmore Bristol Smooth Vellum Card
Tumbled Glass, Peacock Feathers, Twisted Citron, Evergreen Bough
WOW Embossing Slow Drying Embossing Pad
WOW Silver Embossing Powder
300gsm White Card
White Glitter Card
Gemini Jnr Die Cutting Machine


Please note that in order to assist with the running of this blog I do use affiliate links from time to time and there may be some in this post, denoted with a *.  You can use these links at no cost whatsoever to yourself. 
I only work with products I love and my opinions are my own.


Tuesday, 16 November 2021

Whimsy Stamps - DoveArt Watercoloured Tags

 Hello everyone,

Today I have a project to show you that I have been wanting to do for aaaages!

I have wanted to watercolour some of Jennifer Dove's beautiful Whimsy Stamps DoveArt images 

I finally got around to it last week after being inspired by some of Sandy Allnock's fabulous Christmas tags.
I am not a great watercolorist but this was something I really wanted to do and I had a lovely peaceful time painting these tags.

The thing with Jenn's images is that she shows you where the light and shade are in the design which makes them a pleasure to colour.

I also stamped and heat embossed the designs in black as the embossed outlines help contain the watercolour paint making it much easier to work with!

Enormous thanks to Sandy Allnock for always being so kind and inspirational!
Ingredients from Whimsy Stamps*

Thank you for popping by!
Have fun crafting!
from Sue...xxx

Sleigh Ride Rubber Cling Stamp - Whimsy Stamps Winter Lake Rubber Cling Stamp - Whimsy Stamps Snow Road Rubber Cling Stamp - Whimsy Stamps
Wintry Cabin Rubber Cling Stamp - Whimsy Stamps Winter Pines Rubber Cling Stamp - Whimsy Stamps Cardinal Birdhouse Rubber Cling Stamp - Whimsy Stamps
Chickadee and Berries Rubber Cling Stamp - Whimsy Stamps **NEW Stained Glass Window Die Set

Confession time! - quite by accident I used a retired stamp to create the santa tag - I'm so sorry but to be honest you could make a set of these tags using only one image and they would still be lovely!

Other Ingredients
WOW Embossing Pad Slow Drying
WOW Black Embossing Powder
Grey Pearlescent Card
Purple Ribbon


Please note that in order to assist with the running of this blog I do use affiliate links from time to time and there may be some in this post, denoted with a *.  I only work with products I love and my opinions are my own.
Please see my About Me page for more information.


Monday, 15 November 2021

Whimsy Stamps Santa Sneaking with Brutus Monroe Aqua Pigments

Happy Monday friends!

(There is such a thing - honestly)! 

Today wonderful Whimsy Stamps has a fun collaboration happening with Brutus Monroe!

It's all happening on instagram right now - I'll pop a link at the end of the post for you!

I have made a Christmas card with an inky background (oh how I love doing those)!
I used some Brutus Monroe Slimline Precut Watercolor Paper Sheets and hand painted the background with some Brutus Monroe Aqua Pigments - oh my, I love them!  Especially the silver one which gives everything a gorgeous pearly shimmer!

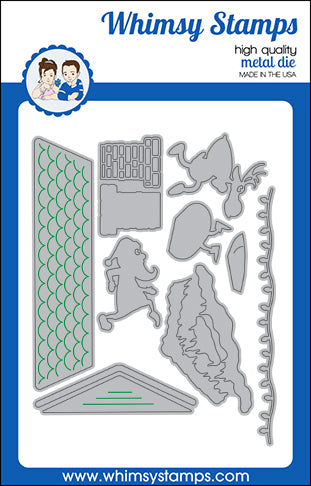
I used my current favourite Whimsy Stamps Die Set - Sneaking Santa to create the rooftop and chimney - I cut the dies down to fit a portrait style slimline design.

I stamped and eat embossed the sleigh and reindeer from an oldie but a goodie Whimsy Stamps Clear Stamps set - Dash Away.

I finished the design off with the Believe die cut, some snowy dots and a star!

Such fun!
Ingredients from Whimsy Stamps*

Thank you for popping by!
have a fab week and....happy creating!
from Sue...xxx

*NEW Santa Sneaking Die Set Dash Away Clear Stamps - Whimsy Stamps *NEW Believe Word and Shadow Die Set 
Sparkletz - Starry Sky - Whimsy Stamps


Ingredients from Brutus Monroe
White
Yellow
Blue/Green
Silver

Other Ingredients
WOW Slow Drying Embossing Pad
WOW Gold Embossing Powder
Gemini Jnr Die Cutting Machine
300gsm Black Card
Black Glitter Card
Silver Glitter Card 
White Liquitex Acrylic Paint Pen

Follow the link 
HERE
for my instagram account
@tanglemousecards


Please note that in order to assist with the running of this blog I do use affiliate links from time to time and there may be some in this post, denoted with a *.  I only work with products I love and my opinions are my own.
Please see my About Me page for more information.


Friday, 12 November 2021

Stained Glass Window Die Set - Whimsy Stamps

Happy Friday friends...

Today I have a beautiful Christmas card to show you made with a new die set from

Here I have created an inky back ground (link to my tutorial at the end of this post) and layered the dies cuts onto it to create a tunnel effect.

I have stamped the Holy Family image from the 
coloured them with Copics (List at the end of this post) and fussy cut them.  I added some Glamour Dust to their crowns.

I then assembled the card as shown adding a stamped and die cut sentiment.
I used a smaller Stained Glass Window Die for the sentiment.

Finally I added a Starry Sky Spakletz
Ingredients From 

Thank you for popping by today, look after yourselves and have a lovely weekend!
from Sue...xxx

**NEW Stained Glass Window Die Set Glory to God Clear Stamps - Whimsy Stamps

Sparkletz - Starry Sky - Whimsy Stamps

Ingredients from Dies To Die For

Other Ingredients
Skin - E04, E11, E00, E000
Hair - E27, E25, E23, E53
Clothes - BG78, BG75, BG72, BG09, BG05, BG02, B79, B69, B66, B63
Swaddling Clothes - E09, E19, E08, R08

Strathmore Bristol Smooth Vellum Card
*Distress Oxide Ink Pads - Salvaged Patina, Chipped Sapphire
Mica Powder (Perfect Pearls)
300gsm White Card
Copic Opaque White
WOW Slow Drying Embossing Pad
WOW Opaque White Embossing Powder
Gemini Jnr Die Cutting Machine
Gold Glitter Card
Gold Twine

Follow the link
for my background tutorial

Please note that in order to assist with the running of this blog I do use affiliate links from time to time and there may be some in this post, denoted with a *.  I only work with products I love and my opinions are my own.
Please see my About Me page for more information.


Wednesday, 10 November 2021

Whimsy Stamps - Fadoodles Holly

Wednesday greetings friends!

I hope you are having a good week!

Today we have a fabulous Festive new release at wonderful

I have been playing with a beautiful stamp set 
I love these fabulously doodled images and decided to make some wrapping paper.

I cut a sheet of brown paper large enough for my gift (;  and stamped the holly images all over it in black ink.

Then I coloured the holly berries with red pencil and added some white dots to the design with a gel pen.

I added some gift tags which I die cut from Kraft card with the 

I stamped a sentiment and a small sprig of holly from the 
set onto the tags which I attached to the gift with baker's twine.
Ingredients from Whimsy Stamps*

Thank you for popping by today!
happy creating...
from Sue...xxx

**NEW FaDoodle Holly Clear Stamps Bookmark and Tags Die Set - Whimsy Stamps


Ingredients from Dies To Die For

Other Ingredients
Red Pencil
White Gel Pen
Baker's Twine
Gemini Jnr Die Cutting Machine


Please note that in order to assist with the running of this blog I do use affiliate links from time to time and there may be some in this post, denoted with a *.  I only work with products I love and my opinions are my own.
Please see my About Me page for more information.


Friday, 5 November 2021

Whimsy Stamps - Tattered Christmas Stamps Card Set

Happy Fri-Yay friends!

I hope this week has been kind to you!

Today I have a set of Christmas cards to show you, really easily made, with two super new products from
Ingredients from Whimsy Stamps *
 
 
Thank you for popping by today, take care and ....
happy creating!...
from Sue...xxx


**NEW Tattered Christmas Clear Stamps  **NEW 6x6 Paper Pack - Christmas Eve

Pierced and Stitched Circles Die Set - Whimsy Stamps  Crafty Foam Tape White - Whimsy Stamps

Everyday Scripted Sentiments Clear Stamps - Whimsy Stamps


Ingredients from Dies To Die For

Other Ingredients
 

Santa - E04, E11, E00, E000, C3, C1, C0, W4, W2, W00, R29, R27, R24, R14

Reindeer E19, E17, E15, E13, R29, R27, R24, R14


300gsm White Card 
Kraft Card
Vellum
Stazon Black Ink Pad
Gemini Jnr Die Cutting Machine
Red Twine


Please note that in order to assist with the running of this blog I do use affiliate links from time to time and there may be some in this post, denoted with a *.  I only work with products I love and my opinions are my own.
Please see my About Me page for more information.