Showing posts with label Whimsy Stamps New Release. Show all posts

Saturday, 10 September 2022

Witch Whispers - Whimsy Stamps

Morning  everyone!

It's been aaaaaages but I'm back...

....and straight out of the blocks with a super Halloween goodie from wonderful
Ingredients from Whimsy Stamps*
(available in UK from Dies To Die For)

Thank you for popping by today,
Have a super weekend
from Sue...xxx


Other Ingredients
300gsm White Card for Mounting and Card Blank
Canson Mixed Media Paper (New find and I absolutely love it)!
Stazon Black Ink Pad

Background 
Distress Ink
Crackling Campfire, Wild Honey
Silver Mica Powder (Cosmic Shimmer)
White Acrylic Paint

Misti Stamp Tool
Gemini Jnr Die Cutting Machine


Please note that to assist with the running of this blog I do use affiliate links from time to time and there may be some in this post, denoted with a *.  You can use these links at no cost whatsoever to yourself.

I only work with products I love and my opinions are my own.


Here is a single use code for you to use at Whimsy Stamps.

Please enter the store 

HERE

and apply the code

TANGLEMOUSECARDS

at the checkout


Thank you for supporting Whimsy Stamps & tanglemouse cards 


Monday, 1 November 2021

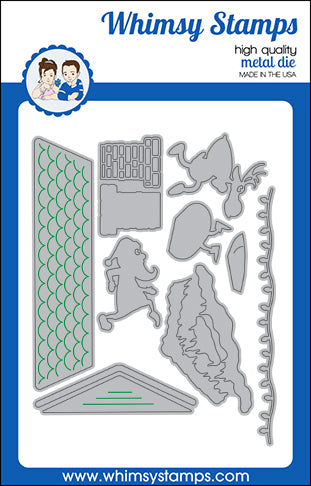
Santa Sneaking Die Set - Whimsy Stamps

 Happy Monday friends ...
(A happy Monday is a thing - honest)!

...well - my Monday is definitely happy because today I get to show you one of my most favourite recent makes!
...oh my word - fun or what!!!

This card is made with a fabulous new die set from 

I created a selection of inky backgrounds with Distress Inks and die cut them to create this super Christmas scene.

The scene is layered onto a night sky which I also created with Distress Inks.

I'll pop a link to a tutorial at the end of this post to show you how I make my inky backgrounds.

I added a stamped and heat embossed sentiment from the 
Ingredients from Whimsy Stamps

Thank you for popping by today,
from Sue...xxx

**NEW Santa Sneaking Die Set You're My Jolly Clear Stamps - Whimsy Stamps Quick Strips Die Set - Whimsy Stamps

 
Ingredients From Dies To Die For

Other Ingredients
Strathmore Bristol Smooth Vellum Card
Background - Antique Linen, Cracked Pistachio, Chipped Sapphire, Black Soot
House - Ripe Persimmon, Fired Brick, Festive Berries, Antique Linen, Pumice Stone , Hickory Smoke
Lights - RipePersimmon, Squeezed Lemonade, Tumbled Glass
Santa and Rudolph - Festive Berries, Black Soot
White and Black Acrylic paint
Honey Doo Crafts White Opal Mica Powder
Distress Splatter Brush*
WOW Embossing Slow Drying Embossing Pad
WOW White Embossing Powder
300gsm White Card
Gemini Jnr Die Cutting Machine

Follow the link
for my inky background tutorial!

Please note that in order to assist with the running of this blog I do use affiliate links from time to time and there may be some in this post, denoted with a *.  You can use these links at no cost whatsoever to yourself. 
I only work with products I love and my opinions are my own.


Tuesday, 1 December 2020

Whimsy Stamps New Release - Snow Angels

 Hello everyone!

1st.of.December!!!...and the less said about that the better I think!!! o-:

I'm here today with two super New Release stamp sets from Whimsy Stamps

Snow Angels Clear Stamps by Krista Heij Barber

Simple Sentiment Strips Clear Stamps by Deb Davis (Amped2Stamp)

I used a selection of Whimsy Stamps goodies to make this fun card.  I splashed some watercolour paint onto a piece of card die cut with the Slimline Card Builder Die

I stamped, coloured and cut out the fab-u-lous Snow Angels and fixed them to the background with Wobble Action Springs!  (Toooo much fun)!

Copic Markers - E04, E21, E00, E00, E18, R59, R29, R27, R14, W8, W7, W5, W3, W2, W0, BV21, BG70, B000

I added the glittery word Merry die cut with the Merry Large Word Die and sentiments from Simple Sentiment Strips and You're My Jolly stamped on to Quick Strips Die cuts.

Finally I added some Sparkletz Crystal Stars

Click on this link to see a little video which will show you the card in a bit more detail!

Ingredients from Whimsy Stamps

Thank you for popping by!

I hope you and those you love are all safe and well.  Happy creating!
love from Sue...xxx

**NEW Snow Angels Clear Stamps **NEW Simple Sentiment Strips Clear Stamps
Slimline Card Builder Die - Whimsy Stamps Merry Large Word Die - Whimsy Stamps
You're My Jolly Clear Stamps - Whimsy Stamps Quick Strips Die Set - Whimsy Stamps
Sparkletz - Crystal Stars - Whimsy Stamps
Other Ingredients

Please note that in order to assist with the running of this blog I do use affiliate links from time to time and there may be some in this post, denoted with a *.  Please see my About Me page for more information.


Wednesday, 15 April 2020

Cute Cacti - THE cutest! Whimsy Stamps New Release...

Hello everyone,

Sending you all good thoughts during these strange days.  I hope you are all staying safe, well and in good spirits.

Today at wonderful 
we have one of the cutest releases ever!

Cute Cacti by our lovely Deb Davis (Amped2Stamp)
Just look at those faces!!!

First up - I must apologise for these photos! I'm not sure what my camera was doing but in real life the colours are far more pastel and delicate - I tried to take the pic a gazillion times but I just could not get a closer representation than this!  So - just think pastel !!!

These cards were such fun to make and came together really easily!

I first stamped and coloured the 
with Copic Markers
I used a selection of greens - G28, G24, YG13, G21, G20 and YG67, YG17, YG13, YG24
T3, V09, V06, V05, E13, E17

Then I cut them out and set them aside.

Next I die cut the Banner backgrounds and frames with the 

I used Catherine Pooler Inks in Tutti Frutti, Sangria and It's A Girl to create the backgrounds along with the 

Next I stamped some of the super sentiments from the 
Cute Cacti set 
and die cut them with the 

I then layered the frame, the sentiments and the cacti on to the background and fixed everything down with

Finally I added some glitter to the background using
Star Dust Stickles Glitter Glue
and a little twine bow.
Please have a good look around the 
Whimsy Inspirations Blog 
at the gorgeous cards by the rest of the Whimsy Stamps Creative Team – and then follow that with a trip to 
store for some essential retail therapy!

Thank you for popping by today!

I hope you are all managing to stay safe and healthy in these uncertain and worrying times!

Happy Crafting

From Sue…xxx

*NEW Cute Cacti Clear Stamps - Whimsy Stamps Shaker Maker Banner Die Set - Whimsy Stamps Quick Strips Die Set - Whimsy Stamps
Polka Dot Stencil - Whimsy Stamps Crafty Foam Tape White - Whimsy Stamps
Stickles Glitter Glue - Star Dust - Whimsy Stamps

Friday, 20 March 2020

Life Goes On - Whimsy Stamps Special Release...

Hello everyone,

I hope you are all well and managing to stay safe and healthy!

Today sees a very special release of the most beautiful products from
Whimsy Stamps
The Whimsy Team have had such a lovely time creating these samples, they are so special to us as the goodies were designed by our lovely Deb Davis - Amped2Stamp!

I could have made dozens of cards - I limited myself to four in the end which i will share with you over the coming days!

I'm kicking things off with these beauties...
Ingredients from Whimsy Stamps 

Other Ingredients
Watercolour Card
Arteza Brush Pens - however, the
stocked at Whimsy Stamps would be perfect as well!
Vellum 
Black Stazon Ink
Glue
Clear Chunky Glitter
 

I used a really easy technique to create the sunflower background.

I chose the colours I wanted for my sunflower and painted the stamp with brush markers roughly where I wanted each colour to be.  Then I sprayed the stamp lightly with water and quickly stamped the image onto watercolour card.

I have to say I was really happy with the effect!

I used the goodies as shown to make my cards.

If you have nt already joined, it's a great time to become a member of the 
Whimsy Stamps

..and there's more! ... if you join up following this link
you will get a $5 off reward discount!

Please have a good look around the 

at the gorgeous cards by the rest of the Whimsy Stamps Creative Team – and then follow that with a trip to 
store for some essential retail therapy!

Thank you for popping by today!

I hope you are all managing to stay safe and healthy in these uncertain and worrying times!

Happy Crafting

From Sue…xxx
*NEW Sunflower Background Rubber Cling Stamp*NEW Lattice A2 Die Shaker Maker Rectangle Die Set

*NEW Sympathy Life Goes On Clear Stamps Notched Squares Die Set

Sunday, 2 February 2020

Whimsy Stamps New Release - Best Fishes

Hello everyone,

I'm back today with more
new release gorgeousness!
Cuteness!!!

I firstly stamped the 
in black ink onto card suitable for alcohol markers, coloured them with Copic Markers and then cut them out and set them to one side.
Copics - E19, R05, YR68, YR15, YR12, Y11, B05

With the 
I die cut a circle of white textured card and then in the centre of the circle I die cut a heart aperture using the 

I die cut a smaller circle to fit behind the aperture.  Then I dabbed some blue and green sparkle pens onto my glass mat, sprayed them with water and pressed the card onto the ink to create the background.

I layered the fishes, the textured card and the inky background onto a larger circle of blue glittery card and firmly fixed everything together.

Finally I stamped the sentiment from the 
under the left hand fish as shown!
Please have a good look around the 
at the gorgeous cards by the rest of the Whimsy Stamps Creative Team – and then follow that with a trip to 
store for some essential retail therapy!

Happy Crafting

From Sue…xxx

*NEW Best Fishes Clear Stamps Pierced and Stitched Circles Die Set *NEW Primitive Shaker Shapes Die Set *NEW Best Fishes Sentiments Clear Stamps

Saturday, 1 February 2020

Whimsy Stamps New Release - Graffiti Girl...

Happy Saturday Friends!

Today is the start of lots of day's fun showing you this months
new release goodies!
I'm kicking things off with
I really enjoyed colouring this card!

I die cut a piece of card suitable for alcohol markers with

I used Copic Markers to colour the rainbow striped background
R89, R39, R37, R35, R32, R000
YR09, YR04, YR12, YR00
Y17, Y13, Y11, Y000
YG17, YG13, YG00, G20, G0000
BG18, B18, B14, B00, B000
BV04, V09, V06, V05, V01, V0000
RV19, RV17, RV13, RV02, RV00
(Thank you to Mindy Baxter - My Creative Scoop for the colour palette inspiration)

Then I stamped the
onto card suitable for alcohol markers 
image in black ink, coloured her with Copic Markers and cut her out.
Hair BV02, N8, N6, N4, Black Pencil
Clothes C8, C6, C4, R89, R37, R35, R32
Paint Brush, E37, E34, E33, C8
Paint Tin and Paint C0, C1, C3, C5, C6, C8

I die cut some black card with the 
trimmed it to size and fixed it along the bottom of the card design as shown.

I stamped the sentiment and emoji (LOVE it)! from the 
onto the background in black ink and fixed the coloured image to the bottom left hand

Finally I added some lines of 
to the top and edges of the rainbow stripes.
Please have a good look around the 
at the gorgeous cards by the rest of the Whimsy Stamps Creative Team – and then follow that with a trip to 
store for some essential retail therapy!

Happy Crafting

From Sue…xxx

*NEW Graffiti Girl Clear Stamps  *NEW Wonky Stitched Rectangles Die Set  Wavy Edgers Die Set

Stickles Glitter Glue - Star Dust