Friday, 12 November 2021

Stained Glass Window Die Set - Whimsy Stamps

Happy Friday friends...

Today I have a beautiful Christmas card to show you made with a new die set from

Here I have created an inky back ground (link to my tutorial at the end of this post) and layered the dies cuts onto it to create a tunnel effect.

I have stamped the Holy Family image from the 
coloured them with Copics (List at the end of this post) and fussy cut them.  I added some Glamour Dust to their crowns.

I then assembled the card as shown adding a stamped and die cut sentiment.
I used a smaller Stained Glass Window Die for the sentiment.

Finally I added a Starry Sky Spakletz
Ingredients From 

Thank you for popping by today, look after yourselves and have a lovely weekend!
from Sue...xxx

**NEW Stained Glass Window Die Set Glory to God Clear Stamps - Whimsy Stamps

Sparkletz - Starry Sky - Whimsy Stamps

Ingredients from Dies To Die For

Other Ingredients
Skin - E04, E11, E00, E000
Hair - E27, E25, E23, E53
Clothes - BG78, BG75, BG72, BG09, BG05, BG02, B79, B69, B66, B63
Swaddling Clothes - E09, E19, E08, R08

Strathmore Bristol Smooth Vellum Card
*Distress Oxide Ink Pads - Salvaged Patina, Chipped Sapphire
Mica Powder (Perfect Pearls)
300gsm White Card
Copic Opaque White
WOW Slow Drying Embossing Pad
WOW Opaque White Embossing Powder
Gemini Jnr Die Cutting Machine
Gold Glitter Card
Gold Twine

Follow the link
for my background tutorial

Please note that in order to assist with the running of this blog I do use affiliate links from time to time and there may be some in this post, denoted with a *.  I only work with products I love and my opinions are my own.
Please see my About Me page for more information.


Wednesday, 10 November 2021

Whimsy Stamps - Fadoodles Holly

Wednesday greetings friends!

I hope you are having a good week!

Today we have a fabulous Festive new release at wonderful

I have been playing with a beautiful stamp set 
I love these fabulously doodled images and decided to make some wrapping paper.

I cut a sheet of brown paper large enough for my gift (;  and stamped the holly images all over it in black ink.

Then I coloured the holly berries with red pencil and added some white dots to the design with a gel pen.

I added some gift tags which I die cut from Kraft card with the 

I stamped a sentiment and a small sprig of holly from the 
set onto the tags which I attached to the gift with baker's twine.
Ingredients from Whimsy Stamps*

Thank you for popping by today!
happy creating...
from Sue...xxx

**NEW FaDoodle Holly Clear Stamps Bookmark and Tags Die Set - Whimsy Stamps


Ingredients from Dies To Die For

Other Ingredients
Red Pencil
White Gel Pen
Baker's Twine
Gemini Jnr Die Cutting Machine


Please note that in order to assist with the running of this blog I do use affiliate links from time to time and there may be some in this post, denoted with a *.  I only work with products I love and my opinions are my own.
Please see my About Me page for more information.


Friday, 5 November 2021

Whimsy Stamps - Tattered Christmas Stamps Card Set

Happy Fri-Yay friends!

I hope this week has been kind to you!

Today I have a set of Christmas cards to show you, really easily made, with two super new products from
Ingredients from Whimsy Stamps *
 
 
Thank you for popping by today, take care and ....
happy creating!...
from Sue...xxx


**NEW Tattered Christmas Clear Stamps  **NEW 6x6 Paper Pack - Christmas Eve

Pierced and Stitched Circles Die Set - Whimsy Stamps  Crafty Foam Tape White - Whimsy Stamps

Everyday Scripted Sentiments Clear Stamps - Whimsy Stamps


Ingredients from Dies To Die For

Other Ingredients
 

Santa - E04, E11, E00, E000, C3, C1, C0, W4, W2, W00, R29, R27, R24, R14

Reindeer E19, E17, E15, E13, R29, R27, R24, R14


300gsm White Card 
Kraft Card
Vellum
Stazon Black Ink Pad
Gemini Jnr Die Cutting Machine
Red Twine


Please note that in order to assist with the running of this blog I do use affiliate links from time to time and there may be some in this post, denoted with a *.  I only work with products I love and my opinions are my own.
Please see my About Me page for more information.


Monday, 1 November 2021

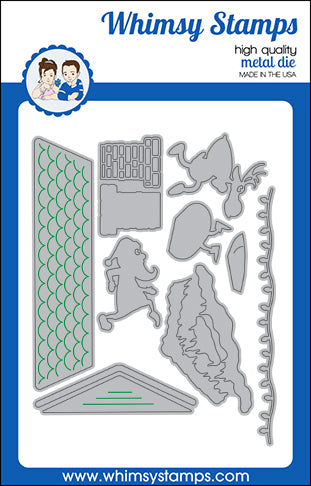
Santa Sneaking Die Set - Whimsy Stamps

 Happy Monday friends ...
(A happy Monday is a thing - honest)!

...well - my Monday is definitely happy because today I get to show you one of my most favourite recent makes!
...oh my word - fun or what!!!

This card is made with a fabulous new die set from 

I created a selection of inky backgrounds with Distress Inks and die cut them to create this super Christmas scene.

The scene is layered onto a night sky which I also created with Distress Inks.

I'll pop a link to a tutorial at the end of this post to show you how I make my inky backgrounds.

I added a stamped and heat embossed sentiment from the 
Ingredients from Whimsy Stamps

Thank you for popping by today,
from Sue...xxx

**NEW Santa Sneaking Die Set You're My Jolly Clear Stamps - Whimsy Stamps Quick Strips Die Set - Whimsy Stamps

 
Ingredients From Dies To Die For

Other Ingredients
Strathmore Bristol Smooth Vellum Card
Background - Antique Linen, Cracked Pistachio, Chipped Sapphire, Black Soot
House - Ripe Persimmon, Fired Brick, Festive Berries, Antique Linen, Pumice Stone , Hickory Smoke
Lights - RipePersimmon, Squeezed Lemonade, Tumbled Glass
Santa and Rudolph - Festive Berries, Black Soot
White and Black Acrylic paint
Honey Doo Crafts White Opal Mica Powder
Distress Splatter Brush*
WOW Embossing Slow Drying Embossing Pad
WOW White Embossing Powder
300gsm White Card
Gemini Jnr Die Cutting Machine

Follow the link
for my inky background tutorial!

Please note that in order to assist with the running of this blog I do use affiliate links from time to time and there may be some in this post, denoted with a *.  You can use these links at no cost whatsoever to yourself. 
I only work with products I love and my opinions are my own.


Saturday, 30 October 2021

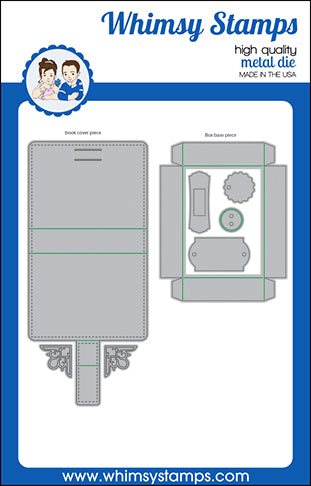
Whimsy Stamps - ATC Book Die and Eye Scream Stamps

 Happy Halloween weekend ghoulfriends! 

Creepy greetings are being sent your way!

My final halloween creation this year was fa-BOO-lous fun to make!
The ATC Book is made with card with Distress Inks blended over it, (link to tutorial at the end of this post), and black cardstock.

Open the book if you dare - cue lots of creepy laughter!!!
Ingredients from Whimsy Stamps

Thank you for popping by today!
Happy haunting and have a SPOOK-tac-u-lar Halloween!
Please stay safe if you are out Trick or Treating!
from Sue...xxx

**NEW ATC Book Die Set - Whimsy Stamps Eye Scream Clear Stamps - Whimsy Stamps

Ingredients from Dies To Die For

Other Ingredients
 
Eyes - R59, R46, Y38, Y17, T5, T3, T0
Wings - BV29, BV25, BV23
Bandages - E81, E43

Strathmore Bristol Smooth Vellum Card
*Distress Oxide Ink Pads - Hickory Smoke, Rusty Hinge and Antique Linen
Mica Powder (Perfect Pearls)
300gsm Black Card
White and Black Acrylic Paint
Gemini Jnr Die Cutting Machine


Follow the link
for my background tutorial

Please note that in order to assist with the running of this blog I do use affiliate links from time to time and there may be some in this post, denoted with a *.  I only work with products I love and my opinions are my own.
Please see my About Me page for more information.


Friday, 29 October 2021

Quick Cards with Vintage Poinsettia Clear Stamps - Whimsy Stamps

 Happy Fri-YAY friends!

If you are anything like me then despite your best intentions you end up doing nearly everything at the last minute!

I've always been the same - I'm approaching my sixth decade - and there ain't no way I'm likely to change the habit of a lifetime!  (:  

To save me (a bit) from flying by the seat of my pants I have designed a set of Christmas cards which are incredibly straightforward and more importantly quick to make. 
I used my current favourite stamp set

I created a set of smallish (10cm x 10cm square) cards in a variety of bold colours with the beautiful poinsettia stamped heat embossed in gold.

I added a stamped and die cut sentiment and finished the card off with a few gold sequins.

...truly simples! 
Ingredients from Whimsy Stamps

Thank you for visiting me today, take care of yourselves and have  a super weekend!
from Sue...xxx


**NEW Vintage Poinsettia Clear Stamps Quick Strips Die Set - Whimsy Stamps

WOW Embossing Slow Drying Embossing Pad
WOW Gold Embossing Powder
Gemini Jnr Die Cutting Machine

Please note that in order to assist with the running of this blog I do use affiliate links from time to time and there may be some in this post, denoted with a *.  You can use these links at no cost whatsoever to yourself. 
I only work with products I love and my opinions are my own.


Thursday, 28 October 2021

Decorate a Tree Die Set and ATC Sleigh Ride - Whimsy Stamps

Hello everyone,
I hope this week is being kind to you!

Today's card was a lot of inky fun!
I had an idea in my head when I started this card - you know how that turns out - right???
Anyway, I was pretty happy with the result in the end!

I used a couple of lovely new 
products to make this card teamed up with a Slimline Die from last Christmas

First though I created some inky backgrounds to die cut the trees from with a selection of green Distress Oxides, water and mica powder.  I'll pop a link to a tutorial at the end of this post showing how I make my backgrounds.

The card background and the frame are created in the same way but with only one ink colour - Tumbled Glass.

I stamped and heat embossed in silver the gorgeous 

The card was put together as shown in the pic...
Ingredients From 
Whimsy Stamps*

Thank you for popping by today - look after yourselves and....
Happy creating
from Sue...xxx

**NEW Decorate a Tree Die Set **NEW ATC Sleigh Ride Clear Stamps Slimline Scenic Countryside Die - Whimsy Stamps

Ingredients From Dies To Die For

Other Ingredients
Strathmore Bristol Smooth Vellum Card
Tumbled Glass, Twisted Citron, Peacock Feathers, Evergreen Bough
White Acrylic paint
Honey Doo Crafts White Opal Mica Powder
Distress Splatter Brush*
WOW Embossing Slow Drying Embossing Pad
WOW Silver Embossing Powder
300gsm White Card
Gemini Jnr Die Cutting Machine

Follow the link
for my inky background tutorial!

Please note that in order to assist with the running of this blog I do use affiliate links from time to time and there may be some in this post, denoted with a *.  You can use these links at no cost whatsoever to yourself. 
I only work with products I love and my opinions are my own.