Friday, 15 May 2020

Whimsy Stamps - Cattitude! ...

Happy Fri-Yay Friends!

We have a release of purrrrrr-fect goodies today from wonderful

I have been playing with
Cattitude Clear Stamps (by Deb Davis - Amped2Stamp)
This card was so straightforward to make!

First I die cut a 10.5cm x 13.5cm rectangle of Kraft card with 
different sized circle dies from the 
to create the card design.

Then I die cut three Kraft card circles, each one a size larger than the apertures in the card design.

I stamped a cute attitude on each one and coloured them with 
Prismacolor pencils.  (I'll pop a list of the colours I used at the end of this post)

I coloured the cats with pencil strokes to make them look a bit scruffy!

Then I mounted the cat circles on a 10.cm x 13.5cm background so that they matched up with the circles I had cut in the card design and stuck them down.  (The circles overlapped the edges but I just trimmed them to size with scissors).

...then I fixed the die cut design to the kitty background with 
Crafty Foam Tape 
so you can see a cat peeking out from each circular aperture!

The sentiment is stamped in black ink onto a Quick Strips Die Cut

Such fun and simples!!!
Ingredients from Whimsy Stamps
Cattitude Clear Stamps* (by Deb Davis - Amped2Stamp)

Thank you for popping by today!

I hope you are all managing to stay safe and healthy in these odd times!

Happy Crafting
From Sue…xxx
*NEW Cattitude Clear Stamps - Whimsy Stamps

 Pierced and Stitched Circles Die Set - Whimsy Stamps Quick Strips Die Set - Whimsy Stamps
Crafty Foam Tape White - Whimsy Stamps

Other Ingredients
Kraft Card

Prismacolor Pencils
PC 945 Sienna Brown, PC943 Burnt Ochre, PC1033 Mineral Orange, PC1043 Golden Rod, PC1003 Spanish Orange, PC1099 Expresso, PC1031 Henna, PC 1021 Jade Green, PC1086 Sky Blue Light, PC1005 Limepeel.  (I also used a cream polychromos I had to hand but there is a cream in the Prismacolour set you could use perfectly well).


Please note that in order to assist with the running of this blog I do use affiliate links from time to time and there may be some in this post, denoted with a *.  I only work with products I love and my opinions are my own.
Please see my About Me page for more information.

Monday, 11 May 2020

Whimsy Stamps - Hippo Fun in The Sun...

Hello everyone, 

I'm wishing you all a super day, even if the days are a little odd right now!

I have a cute card to show you today, from a Whimsy Stamps April 2020 New Release stamp set that is just so fabulous it keeps selling out!

This was such a fun card to make.

I first blended blue ink (Tumbled Glass Distress Oxide) over a piece of smooth card and then stamped the brilliant
onto it and heat embossed it in white.

I then trimmed the background into a 13cm square and set it aside.

Next I stamped one of the hippo's and the bucket & spade onto a piece of white card and coloured them with Copic Markers
Hippo - T5, T3, T1, R11, BG0000, BG10
Reds - R59, R46, R27, R14
Blue/Greens - BG09, BG49, BG45, BG32
Sand - E37, E35, E33, E31

Then I cut the images out and put them to one side. 

I created a 10cm by 13cm rectangle of white card and ice cut a square aperture  in the top half of it as shown

I fixed the rectangle to the illusions background with 
Crafty Foam Tape
and stamped the oopsie sentiment in black onto the bottom right hand corner.

Finally I fixed the cheeky hippo and the bucket and spade to the card design with foam tape as shown.
Ingredients From Whimsy Stamps

Thank you for popping by today!

I hope you are all managing to stay safe and healthy in these uncertain and worrying times!

Happy Crafting
From Sue…xxx

*NEW Hippo Fun in the Sun Clear Stamps - Whimsy Stamps Illusions Background Rubber Cling Stamp - Whimsy Stamps
Crafty Foam Tape White - Whimsy Stamps

Please note that in order to assist with the running of this blog I do use affiliate links from time to time and there may be some in this post, denoted with a *.  I only work with products I love and my opinions are my own.
Please see my About Me page for more information.


Friday, 8 May 2020

Whimsy Stamps New Release - Wrinkles (the sort you can love)!...

Hello everyone.

I hope this week has been kind to you and you are all staying safe and well.

Today at wonderful
we have a fab new release!

I have decided to have a play with the fabulous 
I could not resist this cute puppy!

I decided to colour in a background which made it look as though he is peeking over the fence looking for his ball!

Copic Markers
Puppy Pug - T9, T7, T5, T3, E30, 
Fence - E84, E81, E42, E41, E40
Ground - W3, W5, E34, E31,  E30
Ball - YR23, YR04, BG18, BG57

Sky - Distress Oxide Ink Pad in Tumbled Glass
Ingredients from Whimsy Stamps

Thank you for popping by today!
Happy Crafting
From Sue…xxx
Wonky Stitched Rectangles Die Set - Whimsy Stamps *NEW Wrinkles Clear Stamps - Whimsy Stamps

Please note that in order to assist with the running of this blog I do use affiliate links from time to time and there may be some in this post, denoted with a *.  I only work with products I love and my opinions are my own.
Please see my About Me page for more information.

Thursday, 7 May 2020

Whimsy Stamps Poppies and Hexagons (or what's happened to Sue)!...

Hello everyone!

I hope you are all staying safe, well and in good spirits!

I have had a totally crafty play and stepped a long way from my comfort zone with today's cards!

The crafty Gods have done something with Sue - pease return her in exchange for chocolate! (; (; (; 

All joking apart I had a lovely time putting these cards together.  I was thinking of all my lovely friends Stateside who will be celebrating Mother's Day this Sunday!
There are a couple of very straightforward tutorials to follow to help you make these cards!

The first is by my lovely Whimsy Stamps DT team, Bev Rochester.

If you follow the link 
it will take you to a tutorial which will show you how to make the flowers!

and...

if you follow the link 
it will take you to a tutorial by me which will show you how to make the inky backgrounds!

If you pop and have a look at those tutorials then putting these cards together is fairly straightforward!

Thank you for popping by today!

I hope you are all managing to stay safe and healthy in these uncertain times!

Happy Crafting
From Sue…xxx

Poppy Flower Die Set - Whimsy Stamps  Nested Hexagon Die Set - Whimsy Stamps
Quick Strips Die Set - Whimsy Stamps Mom's Layered Flowers Clear Stamps - Whimsy Stamps 
6x6 Paper Pack - Cozy Winter - Whimsy Stamps 6x6 Paper Pack - Eggstra Bunnies - Whimsy Stamps
*NEW 6x6 Paper Pack - Festive Desert - Whimsy Stamps 
Crafty Foam Tape White - Whimsy Stamps Sparkletz - Crystal Hearts - Whimsy Stamps

Other Ingredients
Watercolour Card
Inks that respond well to water (I used Sparkle Pens)
Black Ink Pad
White Card
Vellum
Inks for Blending (I used Catherine Pooler Ink Pads)
Glue Gun
Flower Stamens


Please note that in order to assist with the running of this blog I do use affiliate links from time to time and there may be some in this post, denoted with a *.  I only work with products I love and my opinions are my own.
Please see my About Me page for more information.

Friday, 1 May 2020

Whimsy Stamps Fresh Friday - Mermaid Escape...

Hello friends,

I'm back again today with my favourite 
feature
Fresh Friday!

Every week, we'll be mixing up new goodies with a few oldies from the stash. 

This week, I'm playing with
Mermaid Escape Clear Stamps by Deb Davis - Amped2Stamp
Build An Ocean Die Set
6 x 6 Pack Mermaid Paper
This was such a fun card to make!

First I created an inky background using the technique from my Tuesday Tutorial which you can find

I die cut the background with the second largest 
added some blue glitter and the sentiment as shown
and set it aside.

Then I stamped the cute mermaid in black ink onto white card and coloured her with Copic markers
Skin - E71, E11, E01, E00, E000
Hair - G24, BG10, G00, G000
Tail and Top - RV52, RV95, RV93, Y0000

I cut her out and set her to one side.

Then with white card and vellum I die cut a selection of shapes from the wonderful 
and made them sparkly with glue and glitter!

I covered a card blank with a piece of beautiful 
6 x 6 Pack Mermaid Paper
and layered the inky background, the mermaid and the glittery ocean shapes onto it as shown.

Finally I added some 
Ingredients from Whimsy Stamps

Thank you for popping by today!

I hope you are all managing to stay safe and healthy in these uncertain times!

Happy Crafting
From Sue…xxx

Mermaid Escape Clear Stamps - Whimsy Stamps  
Wonky Stitched Rectangles Die Set - Whimsy Stamps Build-an-Ocean Die Set - Whimsy Stamps

Sparkletz - Starry Sky - Whimsy Stamps


Other Ingredients
Make it Colour Blending Card by Elaine Hughes - Marker Geek
Inkon3 Blackout Hybrid Detail Black Ink Pad
Watercolour Card
Crafter's Companion Sparkle Pens
Cobalt Blue Archival Ink Pad
Lawn Fawn Vellum
Cosmic Shimmer Chunky Blue and Chunky White Glitter
Mod Podge


Please note that in order to assist with the running of this blog I do use affiliate links from time to time and there may be some in this post, denoted with a *.  I only work with products I love and my opinions are my own.
Please see my About Me page for more information.

Whimsy Stamps New Release - Barnyard Squares

Hello everyone

'...and the finest month in all the year is the very merry month of May...'

...words from an old English folk song and I do have to agree!

I love May!  (Even if this May is a very different proposition)!

I'm here today to show you a fab new release item from wonderful

I don't do very much 'no line' colouring because to be honest I just can't see the lines! I had great fun having a go with this sweet image though!  

I stamped the image onto white card with Inkon3 Fadeout No line Coloring Ink and coloured it with Copic Markers
Cow - C0, C1, C2, N9, N7, N5, R32, R30, R000
Flowers - V17, V25, V12
Greenery - YG67, YG63, YG03
Sky - BG000, BG0000

Then I trimmed the image along the outline into a square and set it aside.

I created a 13cm square card blank and fixed a piece of design paper from the beautiful
to it.  I added a piece of ribbon across the centre fixing it to the reverse with tape.

Then I die cut white card with the largest banner from the 
and fixed that to the top centre of the card design with 

I die cut a piece of white card with the 9cm die from the 

I left the card in the die and blended blue and green ink over it as shown.
Next I die cut a 5.5cm square of white card to sit just inside the circle and blended ink over it in the same way.

I then layered the square and the image onto the circle fixed it firmly to the banner as shown.

Finally I die cut one of the  
and stamped a sentiment from the Barnyard Squares set onto it.  I fixed the strip to the bottom right hand side of the card design as shown.
Ingredients from Whimsy Stamps

Thank you for popping by today!

I hope you are all managing to stay safe and healthy in these uncertain times!

Happy Crafting
From Sue…xxx

*NEW Barnyard Squares Clear Stamps - Whimsy Stamps *NEW 6x6 Paper Pack - Eggstra Bunnies - Whimsy Stamps Shaker Maker Banner Die Set - Whimsy Stamps
Crafty Foam Tape White - Whimsy Stamps Pierced and Stitched Circles Die Set - Whimsy Stamps
Quick Strips Die Set - Whimsy Stamps


Please note that in order to assist with the running of this blog I do use affiliate links from time to time and there may be some in this post, denoted with a *.  I only work with products I love and my opinions are my own.
Please see my About Me page for more information.

Tuesday, 28 April 2020

Tuesday Tutorial - Whimsy Stamps...

Hello everyone,

These wonderful Tutorial Tuesdays come round quickly don't they!

I hope you are staying safe, well and in good spirits!

I'm here today with a tutorial to show you how to make a simple and colourful card with wonderful
goodies!

Ingredients from Whimsy Stamps
Other Ingredients
Watercolour Card
Black Stazon Ink
White Pen (I used a white water based Sharpie)
Kraft Card

Please follow this simple tutorial to see how I made my card...
Assemble the ingredients as shown.

This is a water colouring project.  I used Sparkle Pens but you can use which ever inks you have to hand, brush markers, ink pads, acrylics, pans, tubes - what ever - the list is endless!  The inks just need to respond well to being sprayed with water!
 
Dab a selection of blue/green inks on your work surface
...and spray with water.
Place a piece of watercolour card face down onto the inks and press down gently.
You should see something like this!  If you want to you can repeat spritzing and pressing the card down but I was happy with this so I didn't over do it!
Put the card to one side to dry.
Repeat the process outlined above with a selection of red and orange inks.
I was happy with this inky piece so again, I stopped spritzing and pressing!
With the Kinetic Wave die cut two pieces of the blue/green inky card.
With the largest circle die cut the red inky card and then die cut the blue wavy die cuts so that they match the circle and lay along the bottom of it.  Fix together.
Using the 13cm and the 11cm circle dies together die cut a piece of Kraft card to make a frame.
Fix the frame to the card design with foam tape as shown.
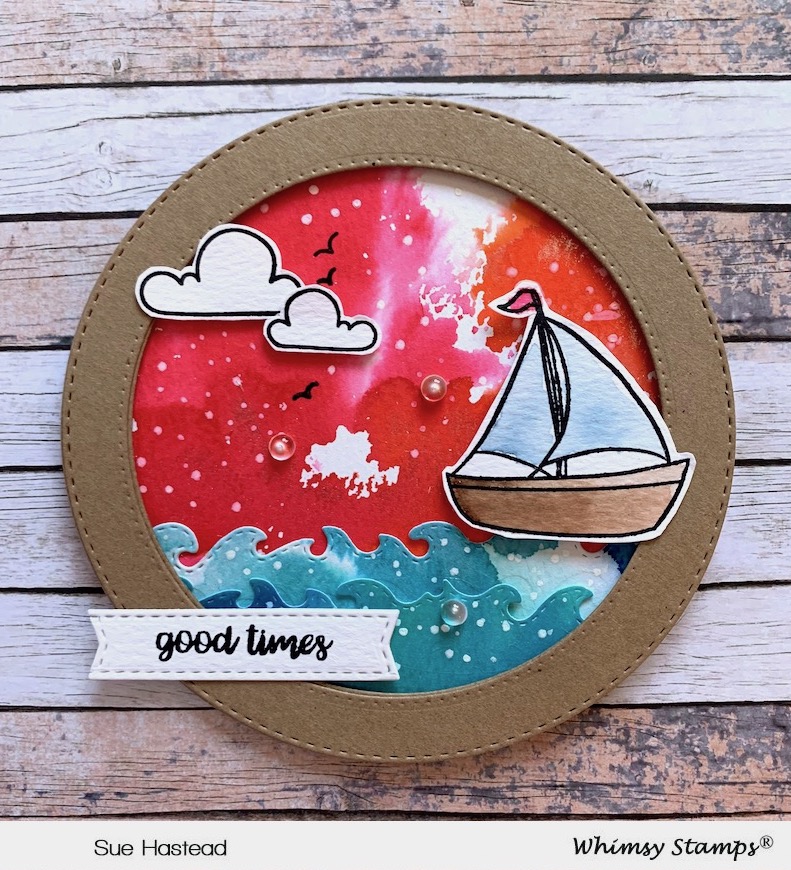
Stamp the boat from the Splash Clear Stamp Set with black Stazon ink, colour it with water colours and cut it out.  (There is no need to take too much time over this - the less you fuss with watercolours the better and to be honest, I think the background is the star of the show in this design)!
Fix the boat and the clouds to the background with foam tape and and stamp the little birds in black ink.

Die cut a piece of watercolour card with a Quick Strips Die and stamp the good times sentiment onto it.  Fix it to the card design as above.

Finish the design by adding some white dots with a white pen and some clear Sparkletz!
Thank you for popping by today!

Take care of yourselves and those you love!

Happy crafting
from Sue...xxx

Splash Clear Stamps - Whimsy Stamps Pierced and Stitched Circles Die Set - Whimsy Stamps Kinetic Straight Waves Die Set - Whimsy Stamps
Quick Strips Die Set - Whimsy Stamps Crafty Foam Tape White - Whimsy Stamps Sparkletz - Salt Water - Whimsy Stamps


Other Ingredients
Watercolour Card
Black Stazon Ink
White Pen (I used a white water based Sharpie)
Kraft Card


Please note that in order to assist with the running of this blog I do use affiliate links from time to time and there may be some in this post, denoted with a *.  I only work with products I love and my opinions are my own.
Please see my About Me page for more information.