Thursday, 19 March 2020

Sending Big Hugs - Bonnie Loves Bows...

Hello friends.

Wishing you all well today, I can hardly believe what is happening in the world at the moment, it is truly shocking and more than a little scary!

It almost feels trivial to be sat here creating and sharing at such a time of stress for so many.  

I only hope that the colourful world we create is a break from the madness and gives some solace!

Stay safe and well friends!

I am sharing a card today created with a beautiful stamp from
I purposefully chose a deeper colour palette to challenge myself with the reds and the skirt folds!

Copic Colours Used
Hair - E47, E44, E43, 
Skin - V12, E93, E00
Reds - R59, R46, R27, R14, R14, R000, R00
Browns - E18, E19, E15

I added some Wink of Stella to her fluffy underskirt!

Although it can be a bit of a b**gg*r I do really enjoy colouring in red!
Ingredients from
Be sure to have a look around our
to see the gorgeous DT creations there and then to 
to engage in some essential retail therapy!

Thank you for popping by!
Happy crafting - look after yourselves and each other!
from Sue...xxx

Tuesday, 17 March 2020

Be lucky...

Hello everyone and a very happy St Patrick's Day!

Lovely Deb Davis at 
has designed a brilliant stamp set to celebrate today!

I really enjoyed making this card!  I challenged myself to think outside the box with it!

First I created a slimline card blank slightly larger than the 
and I used that die to cut a piece of black card. 

Next I splattered green and black Sparkle Pens onto a piece of watercolour card which I then trimmed to sit just inside the slimline die.

I layered the card blank, the black card and the inky card together as shown.

I then blended Distress Oxides Inks in Cracked Pistachio, Peacock Feathers and Twisted Citron over a piece of  smooth card.

I stamped the hat from the 
stamp set several times onto the blended ink and using the 
I cut out the words Be Lucky

I then fixed the letters to a piece of black card with
which I then fixed to the card design as shown, (again with foam tape)

Ingredients from Whimsy Stamps

Thank you for popping by today!

I hope you are all managing to stay safe and healthy in these uncertain and worrying times!

Happy Crafting

From Sue…xxx

*NEW Shamrock Top Hat Clear Stamps Slimline Postage Die Bold ABC Die Set
Crafty Foam Tape White


Please note that in order to assist with the running of this blog I do use affiliate links from time to time and there may be some in this post, denoted with a *.  I only work with products I love and my opinions are my own.
Please see my About Me page for more information.

Tuesday, 10 March 2020

Chicks and Chocolates!...

Happy Tuesday everyone!

Today I have something to show you that combines two of my favourite things...
colouring and chocolate! 

I have used a great new release item from 
Whimsy Stamps
which I am certainly going to be using a lot!

Hexagon Treat Box Die
I have written a quick tutorial for you so you can see how I put this lovely box together!
The first thing I did was stamp and colour one of the the cute chicks from the 
Early Birds Clear Stamp Set by Dustin Pike
Then I inked up a piece of card with blue ink and stencilled darker blue dots over the top.  I die cut a hexagon from the inky card with the 
Nested Hexagon Die Set
 
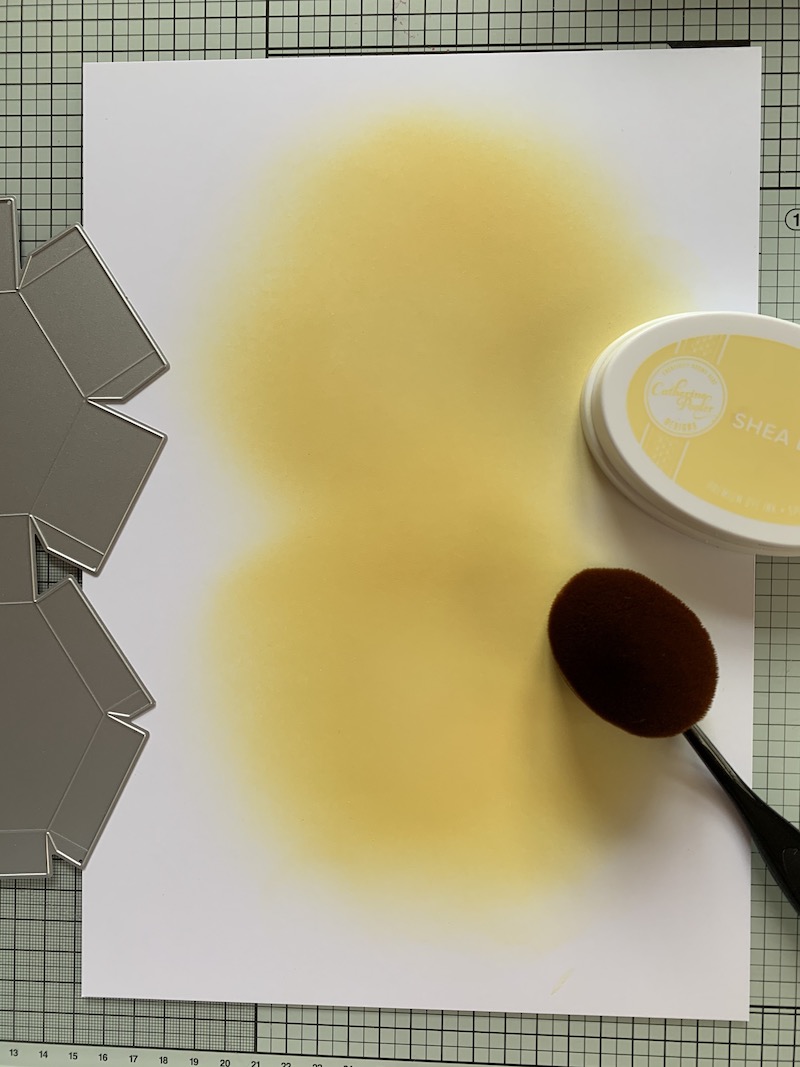
I inked up a second piece of card so that the inky patch was about the same size as the 
Hexagon Treat Box Die
Then using the 
Farmhouse Basket Stencil I inked the card again.
I die cut the inky card with the 
Hexagon Treat Box Die

I then used the 
Nested Hexagon Die Set
  to cut an aperture in the box lid, the blue dotty hexagon created earlier and a piece of acetate.
I layered the die cut acetate and the dotty hexagon and fixed the to the box lid.  This creates a box lid you can see through.
Using a bone folder I made all the creases in the die cut box.  (You'll thank me for the tip of using a bone folder, it makes the creases really sharp which in turn makes sticking the box together really straightforward)!  I fixed the box together with 
Nuvo Deluxe Adhesive

Finally I fixed the chick to the top of the box with a 
Mini Action Wobble Spring
This was such fun to make and is a really cute gift!  Who can resist that wobbly chick - not to mention the chocolates! 

If you have nt already joined, it's a great time to become a member of the 
Whimsy Stamps

..and there's more! ... if you join up following this link
you will get a $5 off reward discount!

Please have a good look around the 
at the gorgeous cards by the rest of the Whimsy Stamps Creative Team – and then follow that with a trip to 
store for some essential retail therapy!

Happy Crafting

From Sue…xxx


*NEW Hexagon Treat Box Die Early Birds Clear Stamps *NEW Nested Hexagon Die Set
Farmhouse Basket Stencil  Nuvo - Deluxe Adhesive

Mini Action Wobbles Springs - 12 pack

Saturday, 7 March 2020

Let them eat cake...

Hello friends,

I hope you are all having a restful weekend!

I'm here today with a something I have been wanting to practice for aaaaages! - the very scary no line colouring!   o-:

I thought this beautiful 
from
would be a good place to start!
Ingredients from

Other Ingredients
Make It Colour Blending Card by Elaine Hughes (Marker Geek)
Copic Markers
Skin - E71. E21, E00, E50
Hair - YR24, E18. E19
Frock - RV95, RV93, RV91, White Gel Pen
Flowers - BV29, BV13, BV02, BV31, YG17, YG61
Cake - E40, E41, E33, E31, R22, Wink of Stella
Caran D'Ache Luminance Pencils - French Grey, Anthraquinoid Pink

Quickie Glue Pen
Cosmic Shimmer Frosted Sparkle Glitterbitz
Tim Holz Distress Ink in Tumbled Glass
Archival Ink pad in Watering Can
I have n't done very much no lines colouring so in all I am really happy with how this turned out!  I nearly gave up while I was colouring her hair - I'n glad now that I stuck with it!
I think you can even see some sparkle if you look closely enough at the flowers!

Whatever your crafting adventure is today I hope you are having fun!


Be sure to have a look around our
to see the gorgeous DT creations there and then to 
to engage in some essential retail therapy!


Thank you for popping by!
Happy crafting
from Sue...xxx


Monday, 2 March 2020

You are my happy place...

Happy Monday friends,

I'm back today to show you another gorgeous new release goodie from wonderful

I'm really chuffed with this card, I decided to just dive in and stat colouring the background without over thinking it!  I'm really happy with how it came out!

The first thing I did was mask Harley's foot by placing a piece of tape over it on the stamp before I inked it up.  Then I removed the tape and stamped Harley on a piece of alcohol marker suitable card.

Then I masked Harley's legs (I use Eclipse Masking Tape - it's the best I have found by a country mile)!

I then stamped the stream over Harley's legs so it looks like he is dipping his foot in the water!

I die cut the image with the largest
and went on to colour it with Copics.
Sky - BG000, B000
Clouds - BG11, C1, C0
Trees/Ground - G21, G20, YG61, YG63
Water - BG78, B95, B91
Skin - E04, E11, E00, E000
Hair - E29, E25, E33, E31, E50
Clothes - E97, Y19, Y15, YR16, W9, W7, BG78, BG75, BG72

I then layered the design onto a piece of polka dot design paper from the 
using 

Finally I die cut a piece of white card with a die from the 
and stamped a sentiment on it from the 

I added the sentiment to the design with
as shown.
If you have nt already joined, it's a great time to become a member of the 
Whimsy Stamps

..and there's more! ... if you join up following this link
you will get a $5 off reward discount!

Please have a good look around the 
at the gorgeous cards by the rest of the Whimsy Stamps Creative Team – and then follow that with a trip to 
store for some essential retail therapy!

Happy Crafting

From Sue…xxx

*NEW Polka Dot Pals Harley Clear Stamps  Rounded Rectangles Die Set  
*NEW Nested Hexagon Die Set  *NEW Yoga Animals Clear Stamps
6x6 Paper Pack - Giraffe 
Crafty Foam Tape White

Sunday, 1 March 2020

Whimsy Stamps New Release...

Happy Sunday and Happy 1st March Friends!
Today I'm showing you a gorgeous new release stamp set from wonderful

Yoga Animals Clear Stamps by Chrissy Armstrong
To make this card I first stamped and coloured the cute 
with Copic Markers and cut them out with my Scan n Cut.

Copic Markers Used
Cow - C0, C1, C2, N9, N7, N5, R32, R30, R000
Bunny, C5, C3, C1

I set them to one side whilst I die cut a piece of watercolour card with the fabulous 

I then dabbed some blue glittery ink onto my glass mat, spritzed it with water and swooshed a piece of watercolour card through it to create the inky background.

Ink Used
Spectrum Noir Sparkle Pen in Blue
(It's a shame the photo has n't picked up the sparkle because it does look really effective)

I layered the background, the die cut frame and the yoga animals as shown and stamped a sentiment from the Yoga Animals Set onto the middle aperture.

I finished my design by adding some 
If you have nt already joined, it's a great time to become a member of the 
Whimsy Stamps

..and there's more! ... if you join up following this link
you will get a $5 off reward discount!


Please have a good look around the 
at the gorgeous cards by the rest of the Whimsy Stamps Creative Team – and then follow that with a trip to 
store for some essential retail therapy!

Happy Crafting

From Sue…xxx

*NEW Yoga Animals Clear Stamps  Slimline Marquee Die

Enamel Dots - Winter Wishes

Wednesday, 26 February 2020

Superstar...

Hello everyone,

Well - it has finally stopped raining here!  It is chilly with blue skies which is a big improvement!

I whooshing by today with a couple of sweet cards made with the fabulous 
February release 
These cards were made by die cutting the stars from the 
and layering them onto a background created with the
and a star embossing folder.

I have used papers from the 
(The second card was made with paper scraps from my stash which I though just went well together).

I made the overall card shape by die cutting the star panels with the largest die from the 

The sentiments I have used are from 
and 
You're Too Kind Clear Stamps  

I finished the cards by adding a
Starry Sky Sparkletz
to the centre of each star.

These cards are in quite a different style for me but I really enjoyed making them!
If you have nt already joined, it's a great time to become a member of the 
Whimsy Stamps

..and there's more! ... if you join up following this link
you will get a $5 off reward discount!


Please have a good look around the 
at the gorgeous cards by the rest of the Whimsy Stamps Creative Team – and then follow that with a trip to 
store for some essential retail therapy!

Happy Crafting

From Sue…xxx

*NEW Primitive Shaker Shapes Die Set  Star Galaxy Stencil

Rounded Rectangles Die Set  6x6 Paper Pack - Starring Hearts

You Are Clear Stamps   You're Too Kind Clear Stamps

Sparkletz - Starry Sky