Thursday, 4 October 2018

Rocket Man...

Hello friends, today I am taking part in a fun Blog Hop to celebrate World Space Week . 

The UN declared in 1999 that World Space Week will be held each year in October 
Find out more on the official WSW page. (http://www.worldspaceweek.org/)

This blog hop is a part of WSW 2018 celebration 
and is listed as an event on the WSW 2018 event list 
which you can find by following the link - (here)

Fantastic artists and companies are supporting the blog hop with incredible generosity. 

These are the prizes they have sponsored:
two $15 Gift Certificates to the Store (for two winners)
 ‘Starfield’ stencil (for one winner)
$20 Gift Certificate to the Store
$15 Gift Certificate to the Store
 
Milka is also giving away a Jane’s Doodles ‘To the Moon’ stamp set to one lucky winner.

I have a card to share with you which I had so much fun making!Ingredients
Black Card
Distress Ink Pads - Worn Lipstick, Peacock Feathers, Chipped Sapphire and Black Soot
White Acylic Paint
White Brilliance Ink Pad
Copic Markers
Skin E04, E11, E01, E000
Hair E41, E43, E44
Red R29, R24, R14
Blue/Green BG57, BG53, BG11
For your chance to win, hop along blogs of the participating designers and 
leave comment on each blog hop stop. 

After commenting, return back to Milka’s blog and add your name to Inlinkz, 
but before you do, please read Giveaway terms, rules and privacy policy 
which are shared in Milka's blog post below Inlinkz.

Inlinkz closes on October 10th 2018, 11:55 PM CEST 
and the winners’ names will be announced on Milka’s blog on 
October 14th 2018 during the day.

Here's the fun bit everyone, time to start hopping!

Sue Hastead(you are here) 
Milka Gubo(Inlinkz)
My space card is one of a set of three I made for Making Cards magazine.
You can still buy this issue of the magazine by following the link
HERE


Part 2 - Traditional Christmas or Old Fashioned Girl!...

Hello everyone, 

I'm back here with the second part of today's wonderful 
Whimsy Stamps new release!

I absolutely love Deb Davis' designs.  Deb is so clever and creates the beautiful 
Whimsy Stamps clear stamp sets which always have so much included in them!

I have used her gorgeous new release Christmas Set

Here is a little tutorial about how I made today's project.

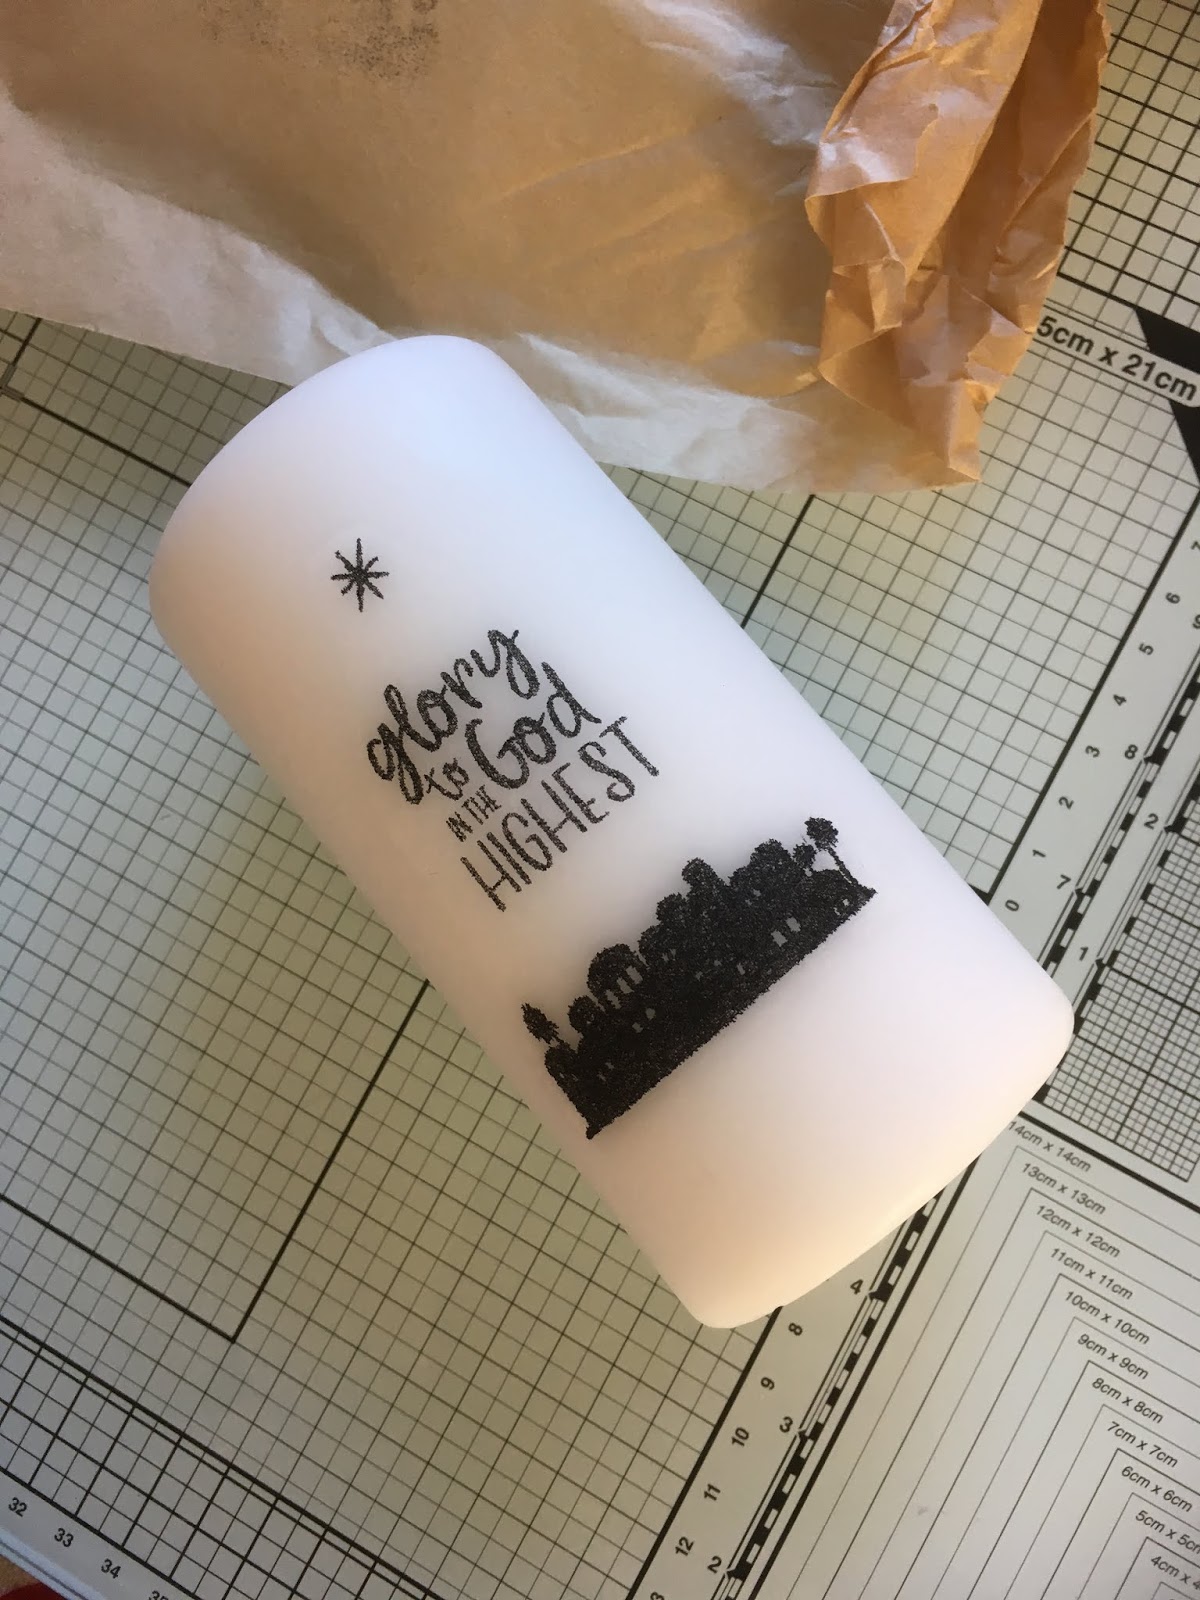
Ingredients - Glory To God Clear Stamps, White Candle, Versafine Onyx Black Ink Pad, Tissues, Greaseproof Paper
I stamped the images on one layer of the tissue (you will need to split the tissue apart) with black ink.
...then I cut the images out as close as possible to the edges and laid the tissue on the candle where I wanted the final design to be.
...next I tightly wrapped the candle in greaseproof paper to cove the tissue image - it is important that the greaseproof paper is very tightly wrapped!
...then I used my heat tool to apply heat to the greaseproof paper.  The heat causes the wax to melt slightly and absorb the tissue leaving the image on the surface of the candle.
Do not hold the heat gun too close to the candle or too long over the same spot or the wax will melt completely and ruin the image.  The heat tool should be held about 25cm away from the paper and slowly moved over the whole image - it may take a while but I promise it is worth it!
It is really exciting when you take the paper away to reveal your stamped design on the candle!
Finally I decorated the candle with twine and some sequins and stood it on a candle plate!

I really enjoyed doing this - why don't you have a go and show your projects to us at 
Whimsy Stamps and Inspiration
you can find us on Facebook by following the link 
HERE

Be sure to pop to 
to see the gorgeous DT creations there and then to 
to engage in some essential retail therapy!

Thank you for popping by,
Happy creating! 
love from Sue...xxx


Part 1 Traditional Christmas... (or old fashioned girl)!...

Hello everyone, I'm back today with lots more 
wonderful Whimsy Stamps gorgeousness!

Today's card is made with an absolutely beautiful stamp by Jennifer Dove 
Christmas Horns Rubber Cling Stamp
and here is a little tutorial to show you how I coloured this wonderful image...

You will need the stamped image, Christmas Horns Rubber Cling Stamp, Copic markers and some colourless blender in a spritzer bottle.
First I coloured the background around the image with
RV93 - it doesn't need to be too neat.
Then, the rest of the background was coloured with RV91.
Then I sprayed the entire design with colourless blender.
The colourless blender creates a lovely dotty pattern on the coloured background.  It doesn't matter that it goes on the image too as it will dry leaving you able to colour the image as usual.  Don't worry about the blender making larger blots as it looks really pretty when it is dry.  (I took the picture below while the blender was still wet so you can see the effect)

I carried on colouring the image with markers as shown - 
silver horns C0, C1, C3, C4
...bow with R35, R37, R56, R59.
...holly leaves with YG03, YG63, G85 and BG99
...frame with R35, R37, R56
Finally I added some Clear and Silver Copic Glitter pen to the horns.  This does n't show very well in the photo but it does look really sparkly!

I really enjoyed doing this - why don't you have a go and show your cards to us at 
Whimsy Stamps and Inspiration
you can find us on Facebook by following the link 
HERE

Be sure to pop to 
to see the gorgeous DT creations there and then to 
to engage in some essential retail therapy!

Thank you for popping by,
Happy creating! 
love from Sue...xxx


Tuesday, 2 October 2018

Christmas Traditions...

Morning everyone!

Welcome to October's Whimsy Stamps New Release week!
Oh my word - we have some absolutely gorgeous goodies for you!
I have come over all traditional with today's card!

I have gone for a Christmas red and gold colour scheme, only used heat embossing in my design and thrown in a bit of glitter card!
This is one of my favourite Christmas sentiments too!

Ingredients from Whimsy Stamps

 Other Ingredients
Red Pearlescent Card
Emboss Pad
Gold Embossing Powder
Gold Glitter Card
Be sure to pop to 
to see the gorgeous DT creations there and then to 
to engage in some essential retail therapy!

Thank you for popping by,
Happy creating! 
love from Sue...xxx

Thursday, 27 September 2018

Jar of Hearts...

Hello everyone,  I hope it's a happy Monday! 

I'm here today to share a special card - special because I made it for a lovely friend's birthday!
It was actually one of the most difficult things I have ever coloured because it involved colouring a transparent object!  
Ingredients from Dies To Die For

Other Ingredients
Make it Colour Blending Card by Elaine Hughes Marker Geek
Copic Markers - 
Background BG11, BG10
Greys  C6, C4, C2, C0
Hearts FV2, V17, V15
Label C1, C0, E50
Purple Twine
Heart Charm
Be sure to have a look around our 
to see the gorgeous DT creations there and pop to then to 
to engage in some essential retail therapy!

Thank you for popping by,
Happy creating! 
love from


Sue...xxx

Wednesday, 26 September 2018

Hot Chocolate Honey...

Happy Wednesday everyone, 

Before I show you today's card I just want to take a moment to say a massive thank you to you all for the love I received for my last post.  
I am quite overwhelmed by it and your kindness means the world to me as for me, that was a very special card to make and share.

...and now for some thing completely different! :)

Today's card has the biggest hair challenge I have ever undertaken...
and...
I am so glad I stuck with it!
Ingredients from Whimsy Stamps 
UK peeps you can buy these goodies from Dies To Die For
Card Builder Windows Die Set
Other Ingredients
Make it Colour Blending Card by Elaine Hughes Marker Geek
MFT Hybrid Ink Pad in Extreme Black
Distress Oxide Ink pads in Wilted Violet and Iced Spruce

Copic Markers
Skin BV00, E53, E000, R20, Eyes B02, YG23
Hair 100, N8, N6, N4, BV04
Jumper G28, G24, G21, FV2, V17, V15
Mug C1, C00, E50

Be sure to pop to 
to see the gorgeous DT creations there and then to 
to engage in some essential retail therapy!

Thank you for popping by,
Happy creating! 
love from Sue...xxx


Sunday, 23 September 2018

to everything there is a season...

To everything there is a season, and a time to every purpose under the heaven:
A time to be born, and a time to die; a time to plant, and a time to pluck up that which is planted;
A time to kill, and a time to heal; a time to break down, and a time to build up;
A time to weep, and a time to laugh; a time to mourn, and a time to dance;
A time to cast away stones, and a time to gather stones together; a time to embrace, and a time to refrain from embracing; A time to get, and a time to lose; a time to keep, and a time to cast away;
A time to rend, and a time to sew; a time to keep silence, and a time to speak;
A time to love, and a time to hate; a time of war, and a time of peace.
Ecclesiastes 3 1-8
For my beloved friend of many years at this time of trial.
Ingredients from Dies To Die For
Copic Markers 
V91, V93, BG10, BG11, BV20, B41, BG0000, W00
Thank you for popping by lovely friends
Sue...xxx