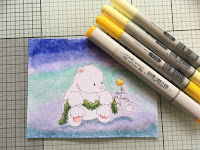
Hello friends,
I'm here today to show you a really easy background technique with Copic Markers, Colourless Blender and some
Whimsy Stamps
new release gorgeousness!
Whimsy Stamps
new release gorgeousness!
Here are the things I've used...
Whimsy Stamps Polar Bear's Christmas Tree Rubber Stamp on Make it Colour Blending Card by Elaine Hughes,
Copic Markers - B66, B63, B60, BG11, BG10, C2, B52, Colourless Blender refill and a natural sponge.
I started by colouring across the bottom of the design with B52
...then with C2...
...then B60... Don't worry about it looking messy, this will soon be fixed!
Then I started colouring across the top of the page with B66...
...then B63...
...then B60...
...then BG11...
...then BG10...
I then repeated all of the above steps, colouring the background once more in exactly the same way.
I'm sure you are all thinking Sue has lost her mind to be showing us such streaky Copic colouring but I promise you this will work out fine! :)
The next step is to dab the background all over with a sponge dipped in Colourless Blender.
I did several layers of this, letting the blender dry between each application.
You will end up with something that looks like this, with lots of texture in the background
I finished the colouring the image with Copics.
I finished my card by sprinkling some Perfect Pearls on the background to add some shimmer, mounting the design on glitter card and adding a silver bow!
UK friends you can buy from Dies To Die For
I hope you have enjoyed this tutorial!
It would be great to see your graduated colour backgrounds! Please share your cards with us at Copic Marker Europe by following the link
Be sure to pop to
to see the gorgeous DT creations there and then to
to engage in some essential retail therapy!
Thank you for popping by,
Happy creating!
love from Sue...xxx


Fantastic tutorial Sue! The finished result is worth the trepidation of the colouring :D. Seriously cute card! Debra x
ReplyDeleteAn amazing tutorial thank you so much for sharing it. The outcome is a fabulous card just love it especially that really cute stamp Love and hugs Carole x
ReplyDeleteThis is FABULOUS. It's amazing how it comes out after all the sponging. I love the polar bear's fur. The gelly roll pen is genius! xx
ReplyDeleteits amazing!
ReplyDeleteGreat picture friendly tutorial. I love these kind of tutorials as they are so easy to follow. Great card and fab background!
ReplyDelete